Quick Start Instructions

Move all 15 of your checkers around the board to your home, then bear them off. First to clear all 15 wins.
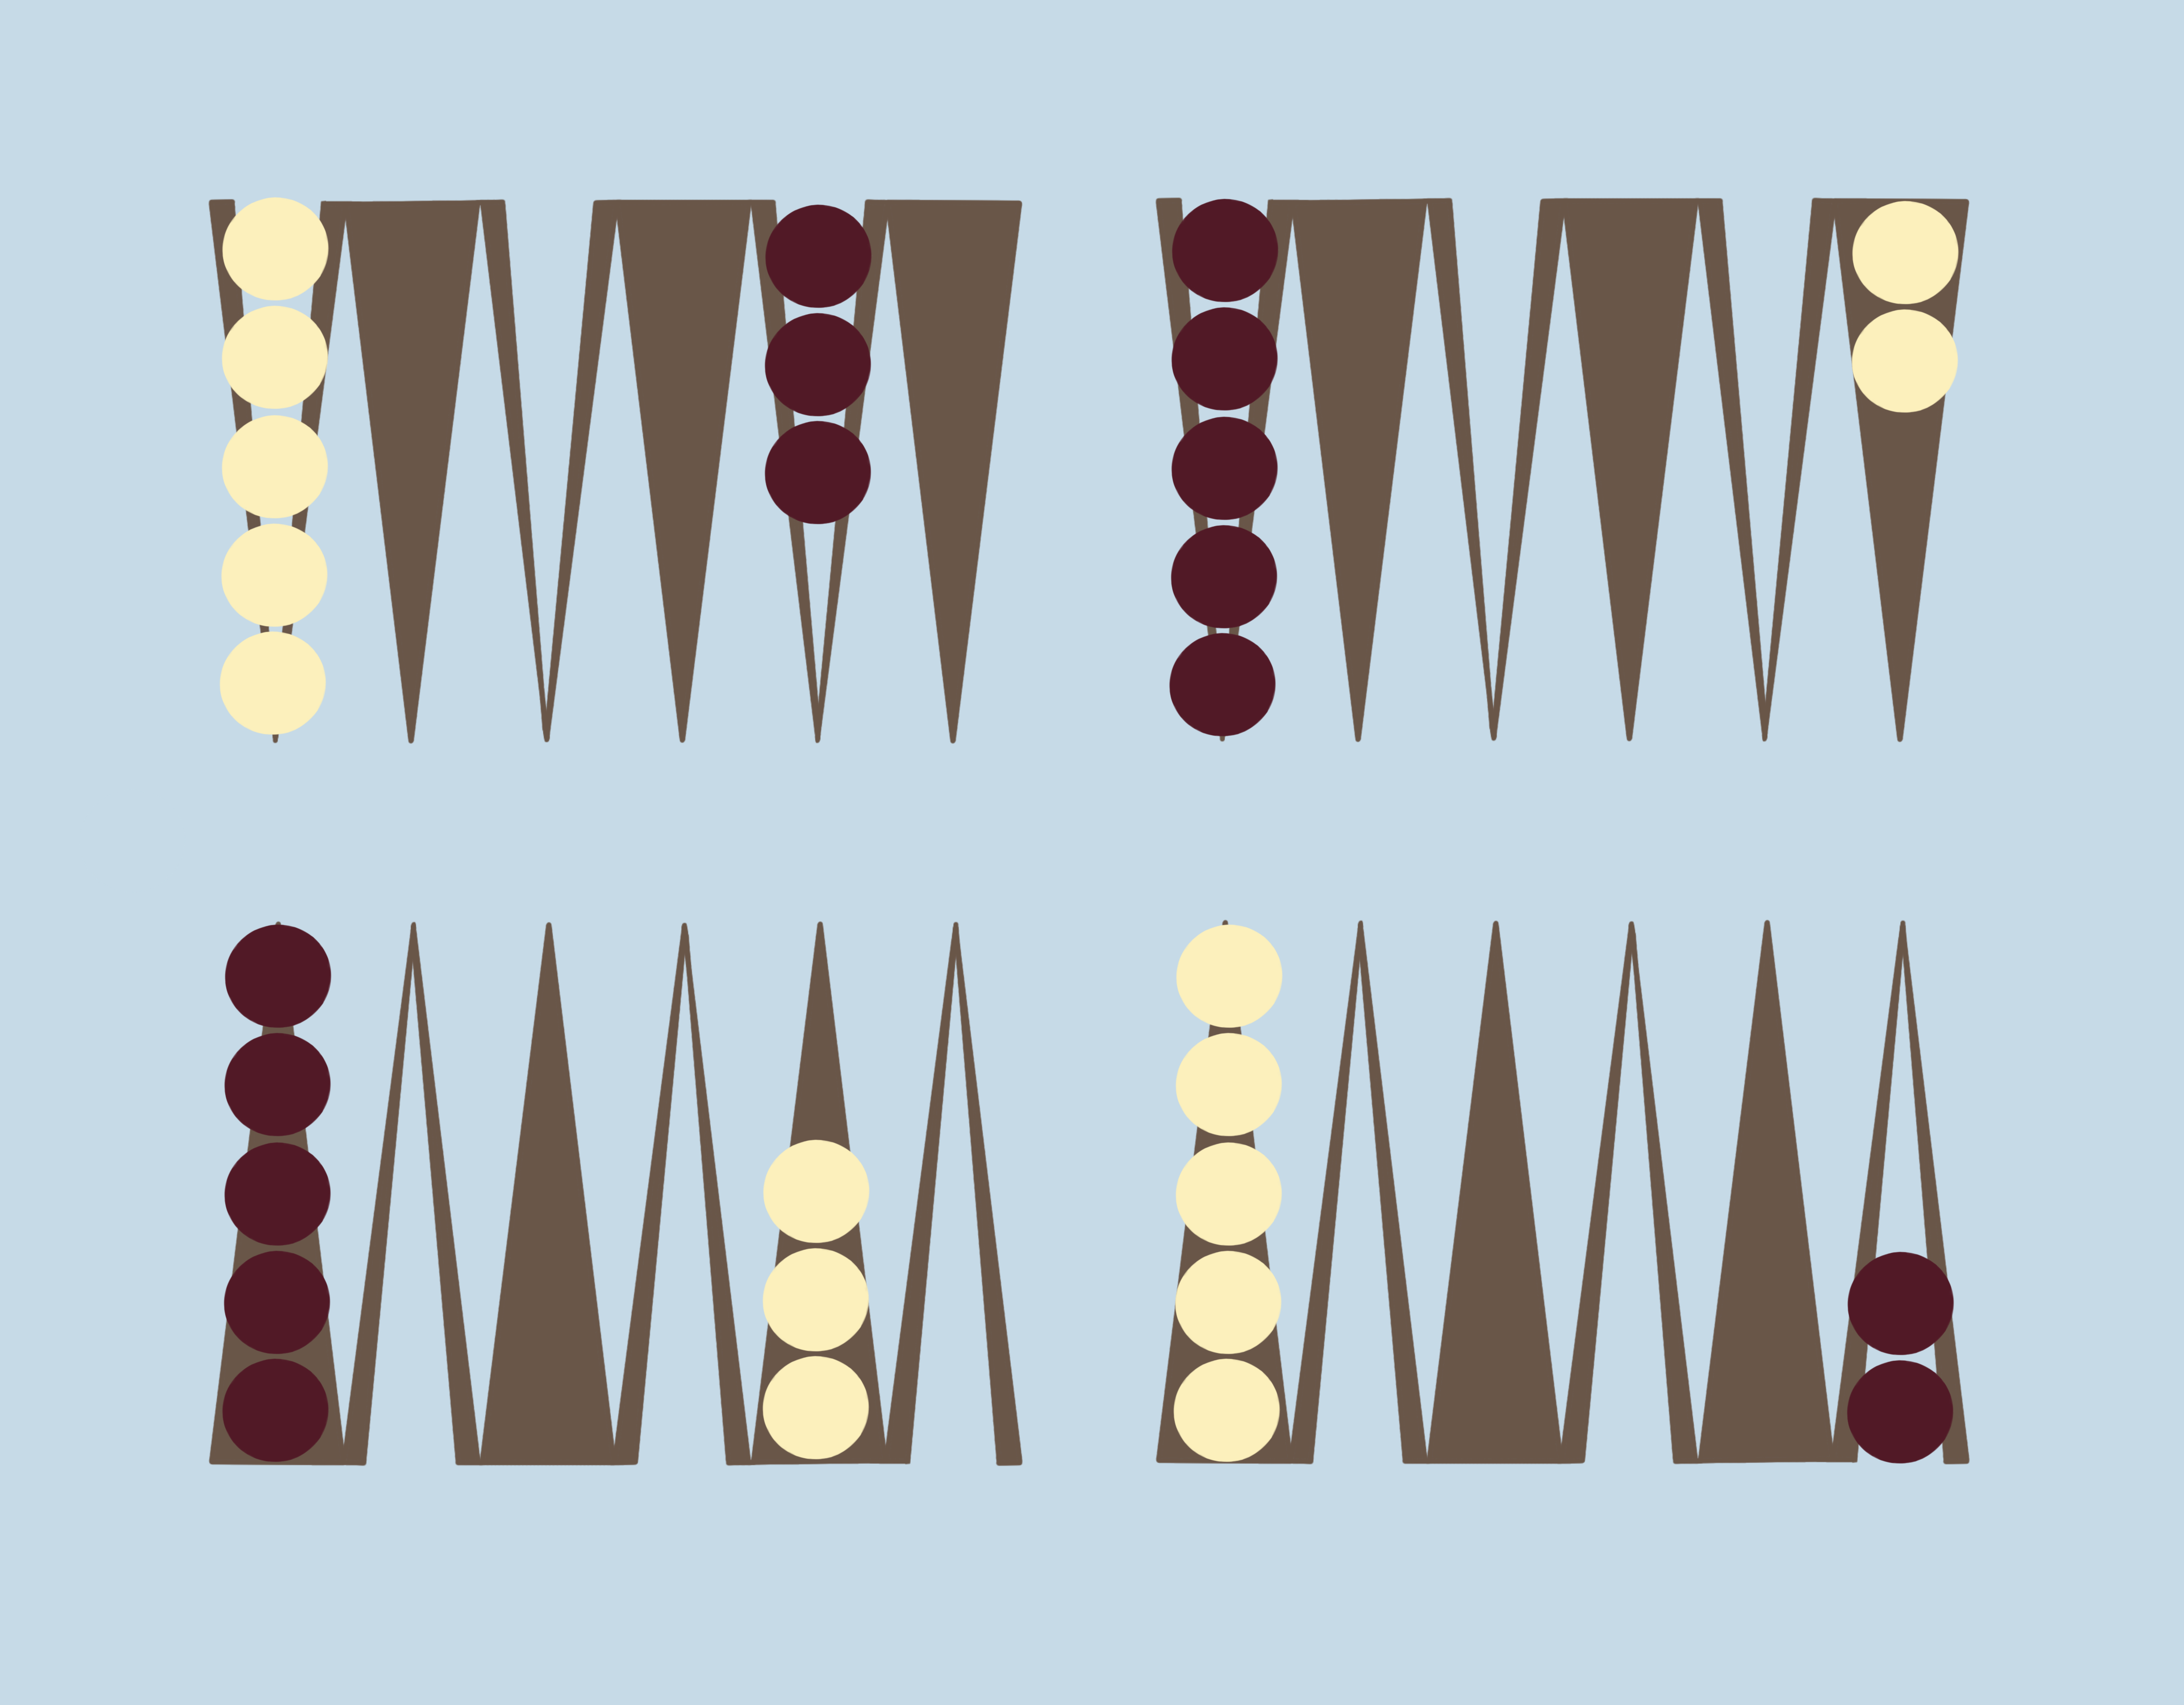
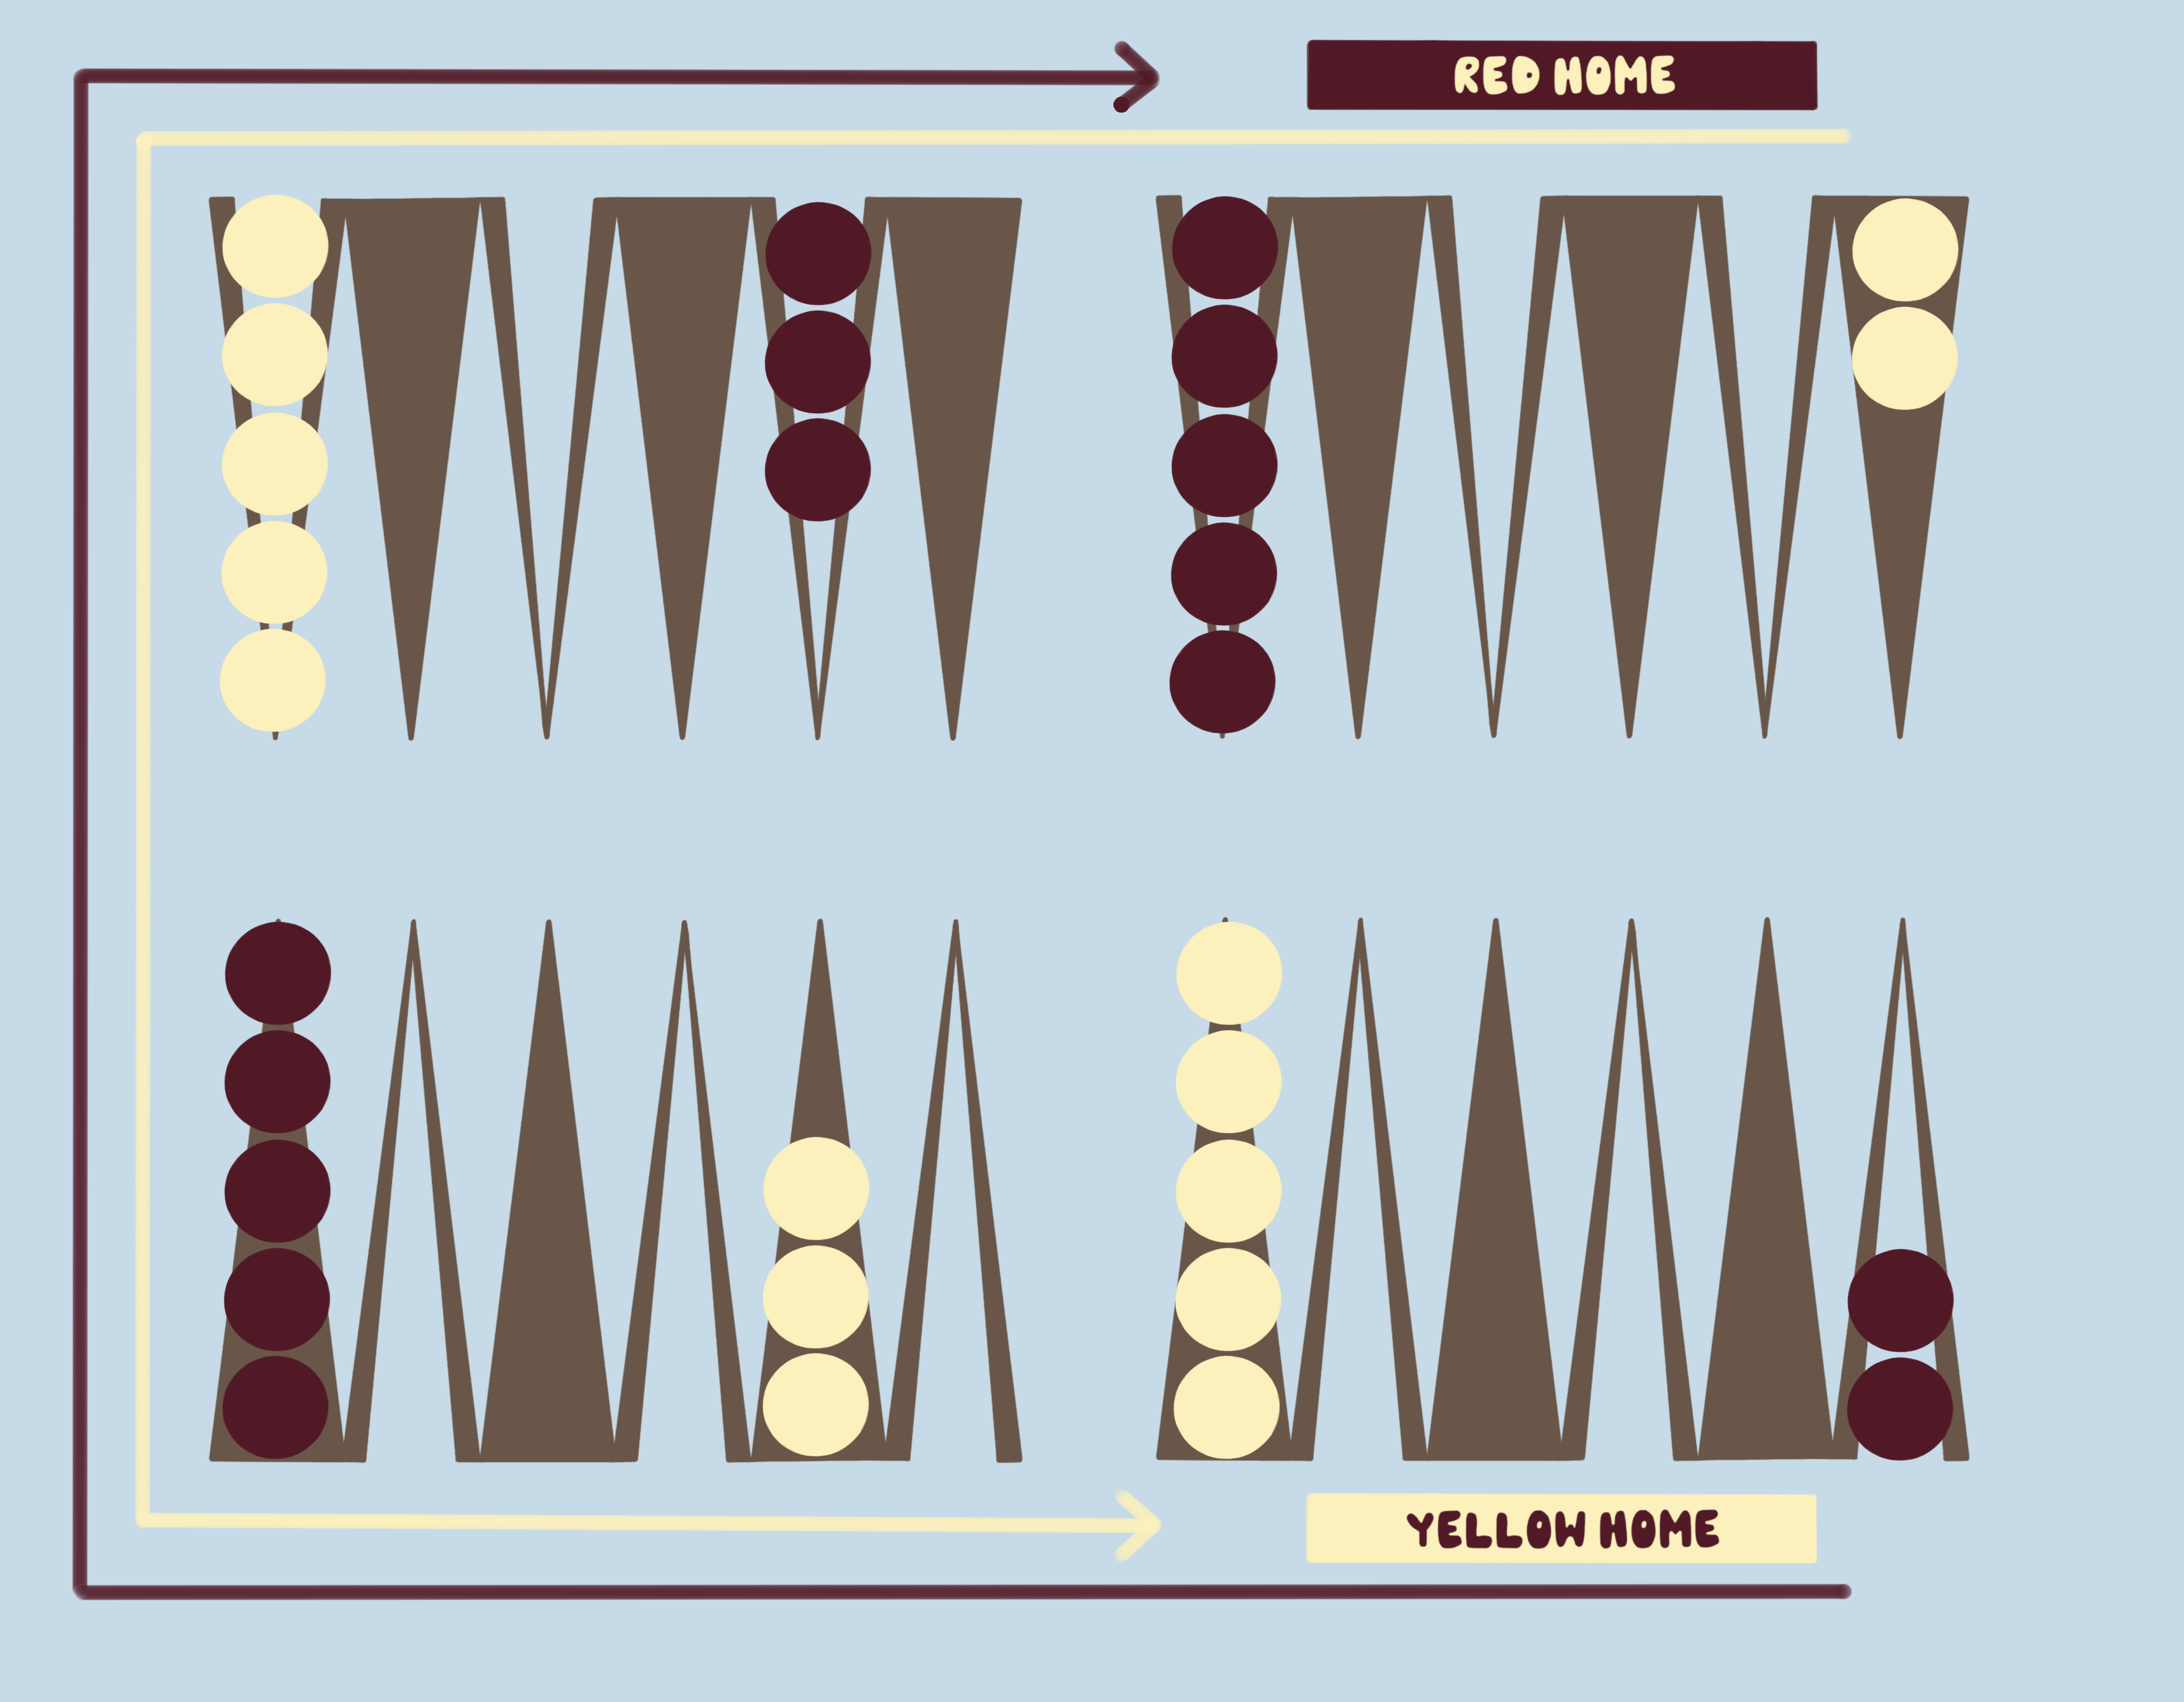
Backgammon starting position

Set up

Moving

  • Roll one die each to start — highest roll goes first, and that roll is your first move
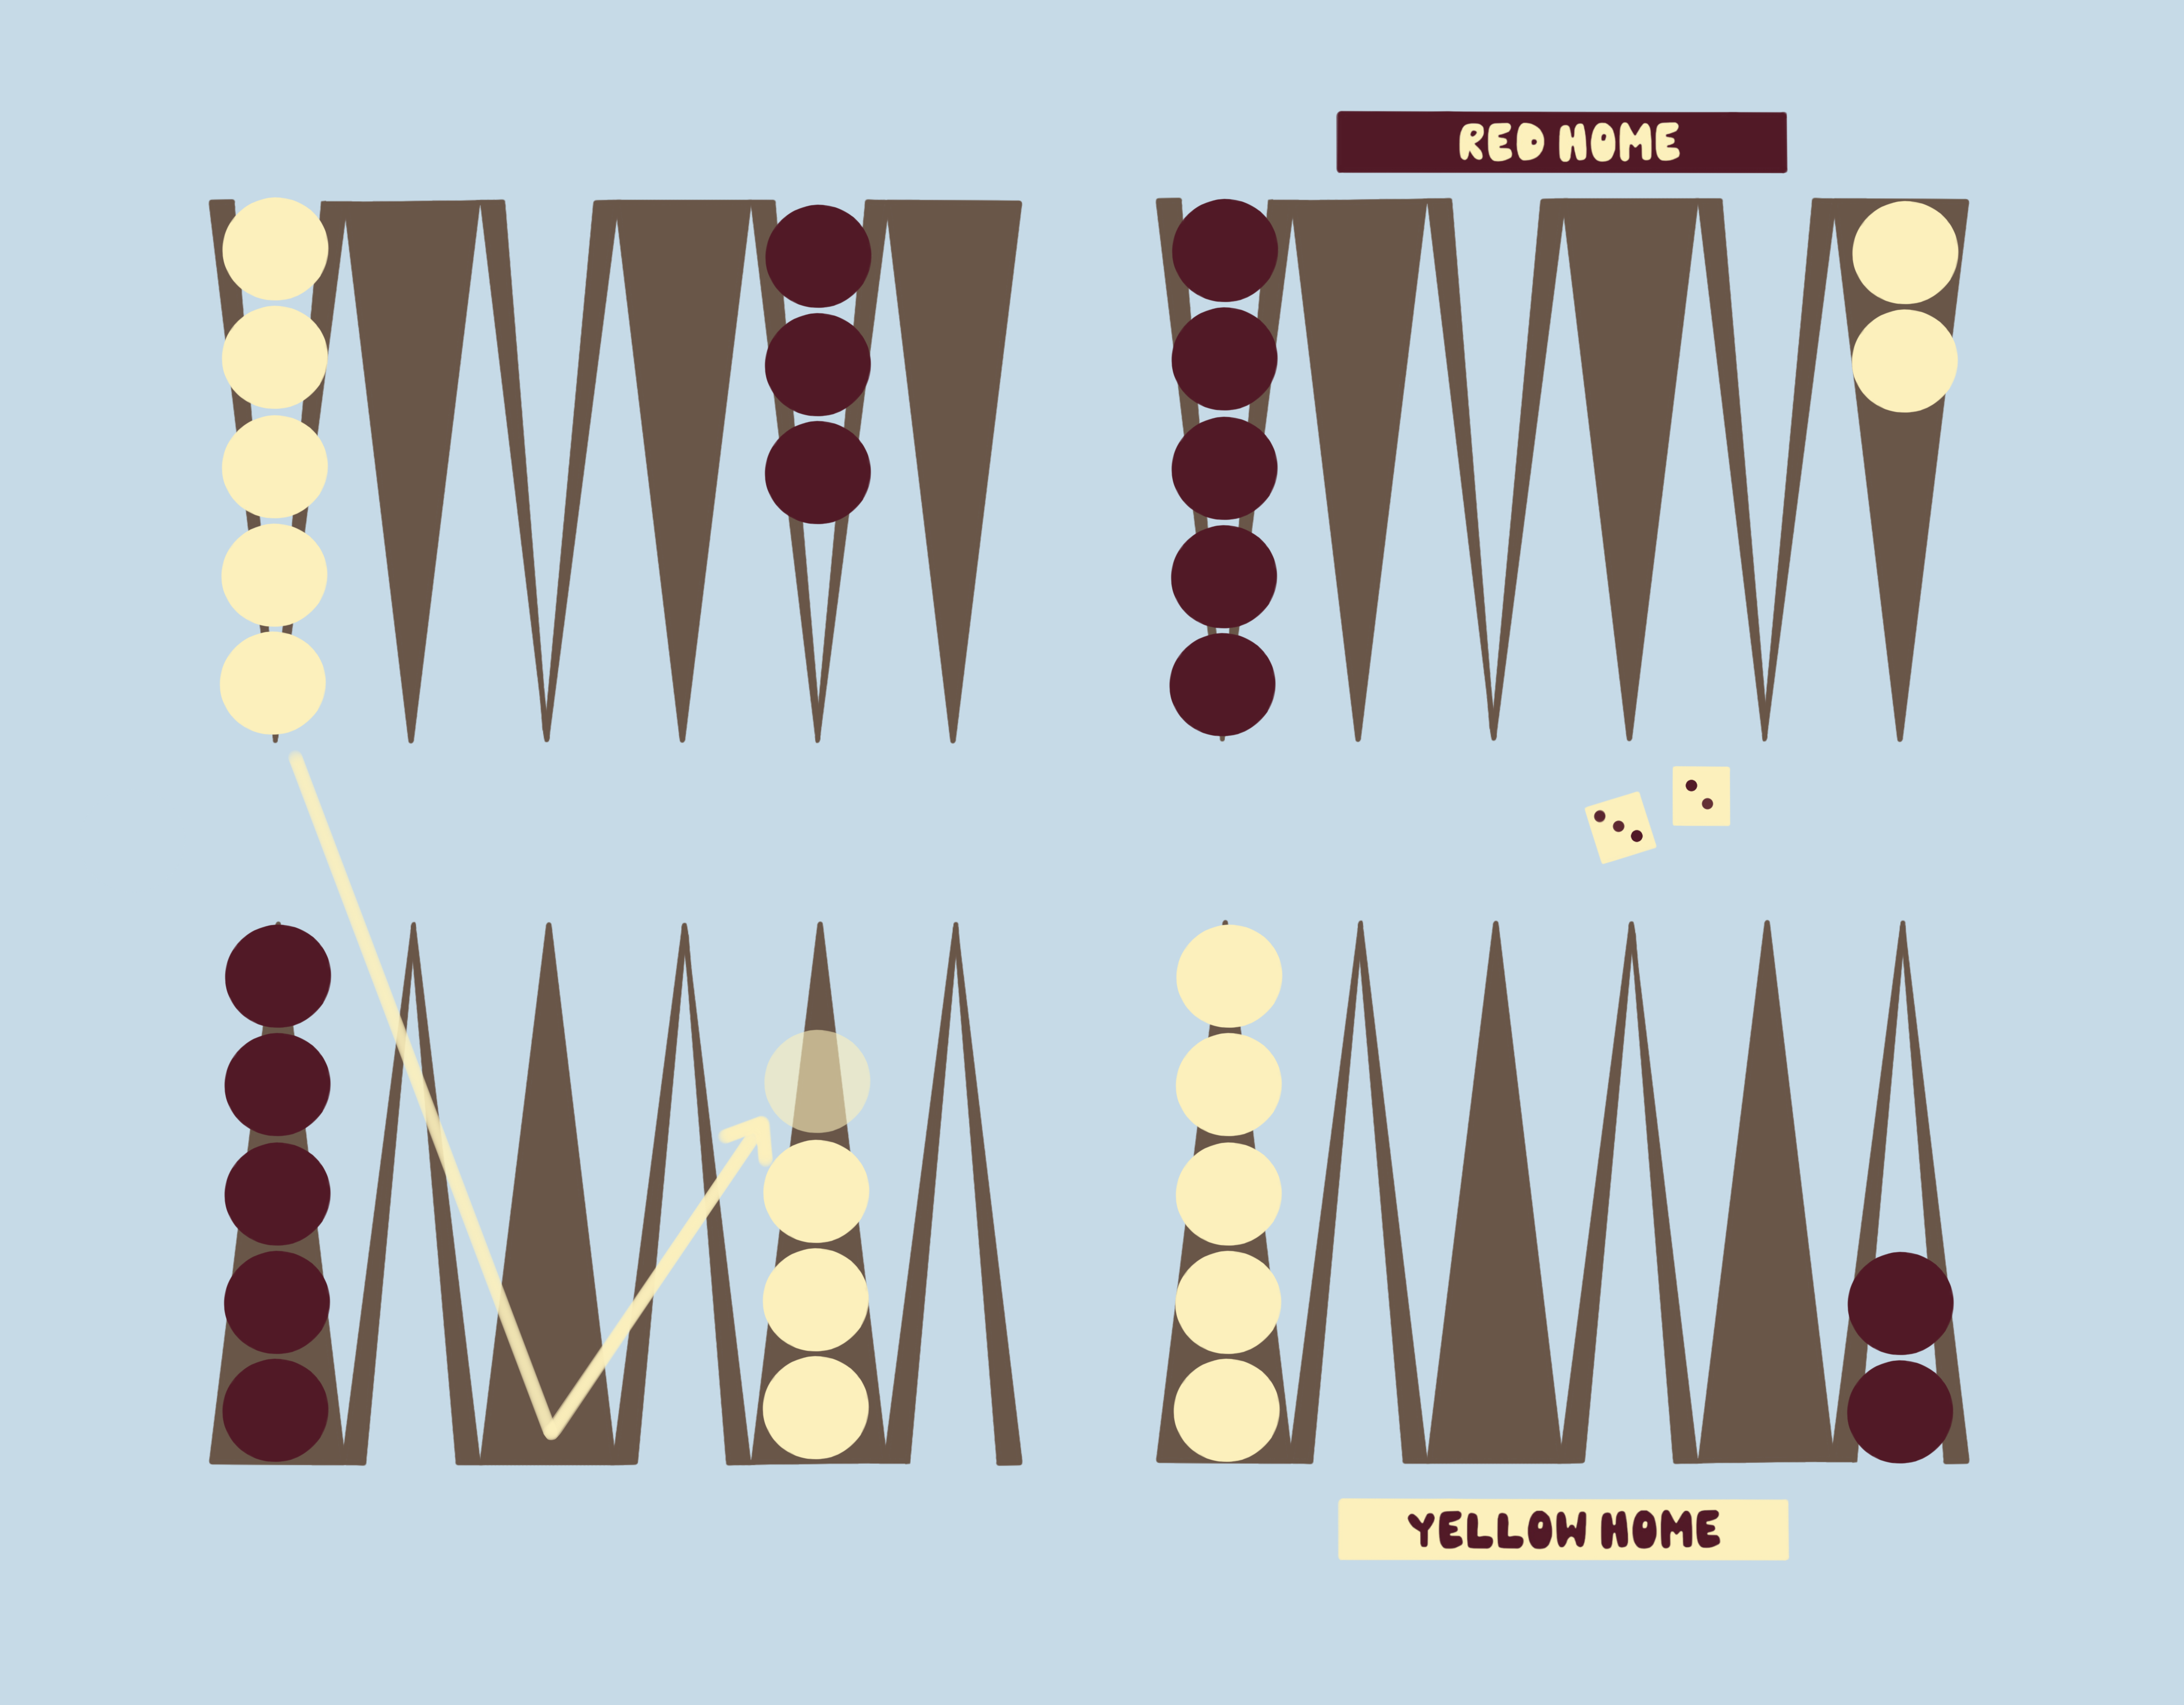
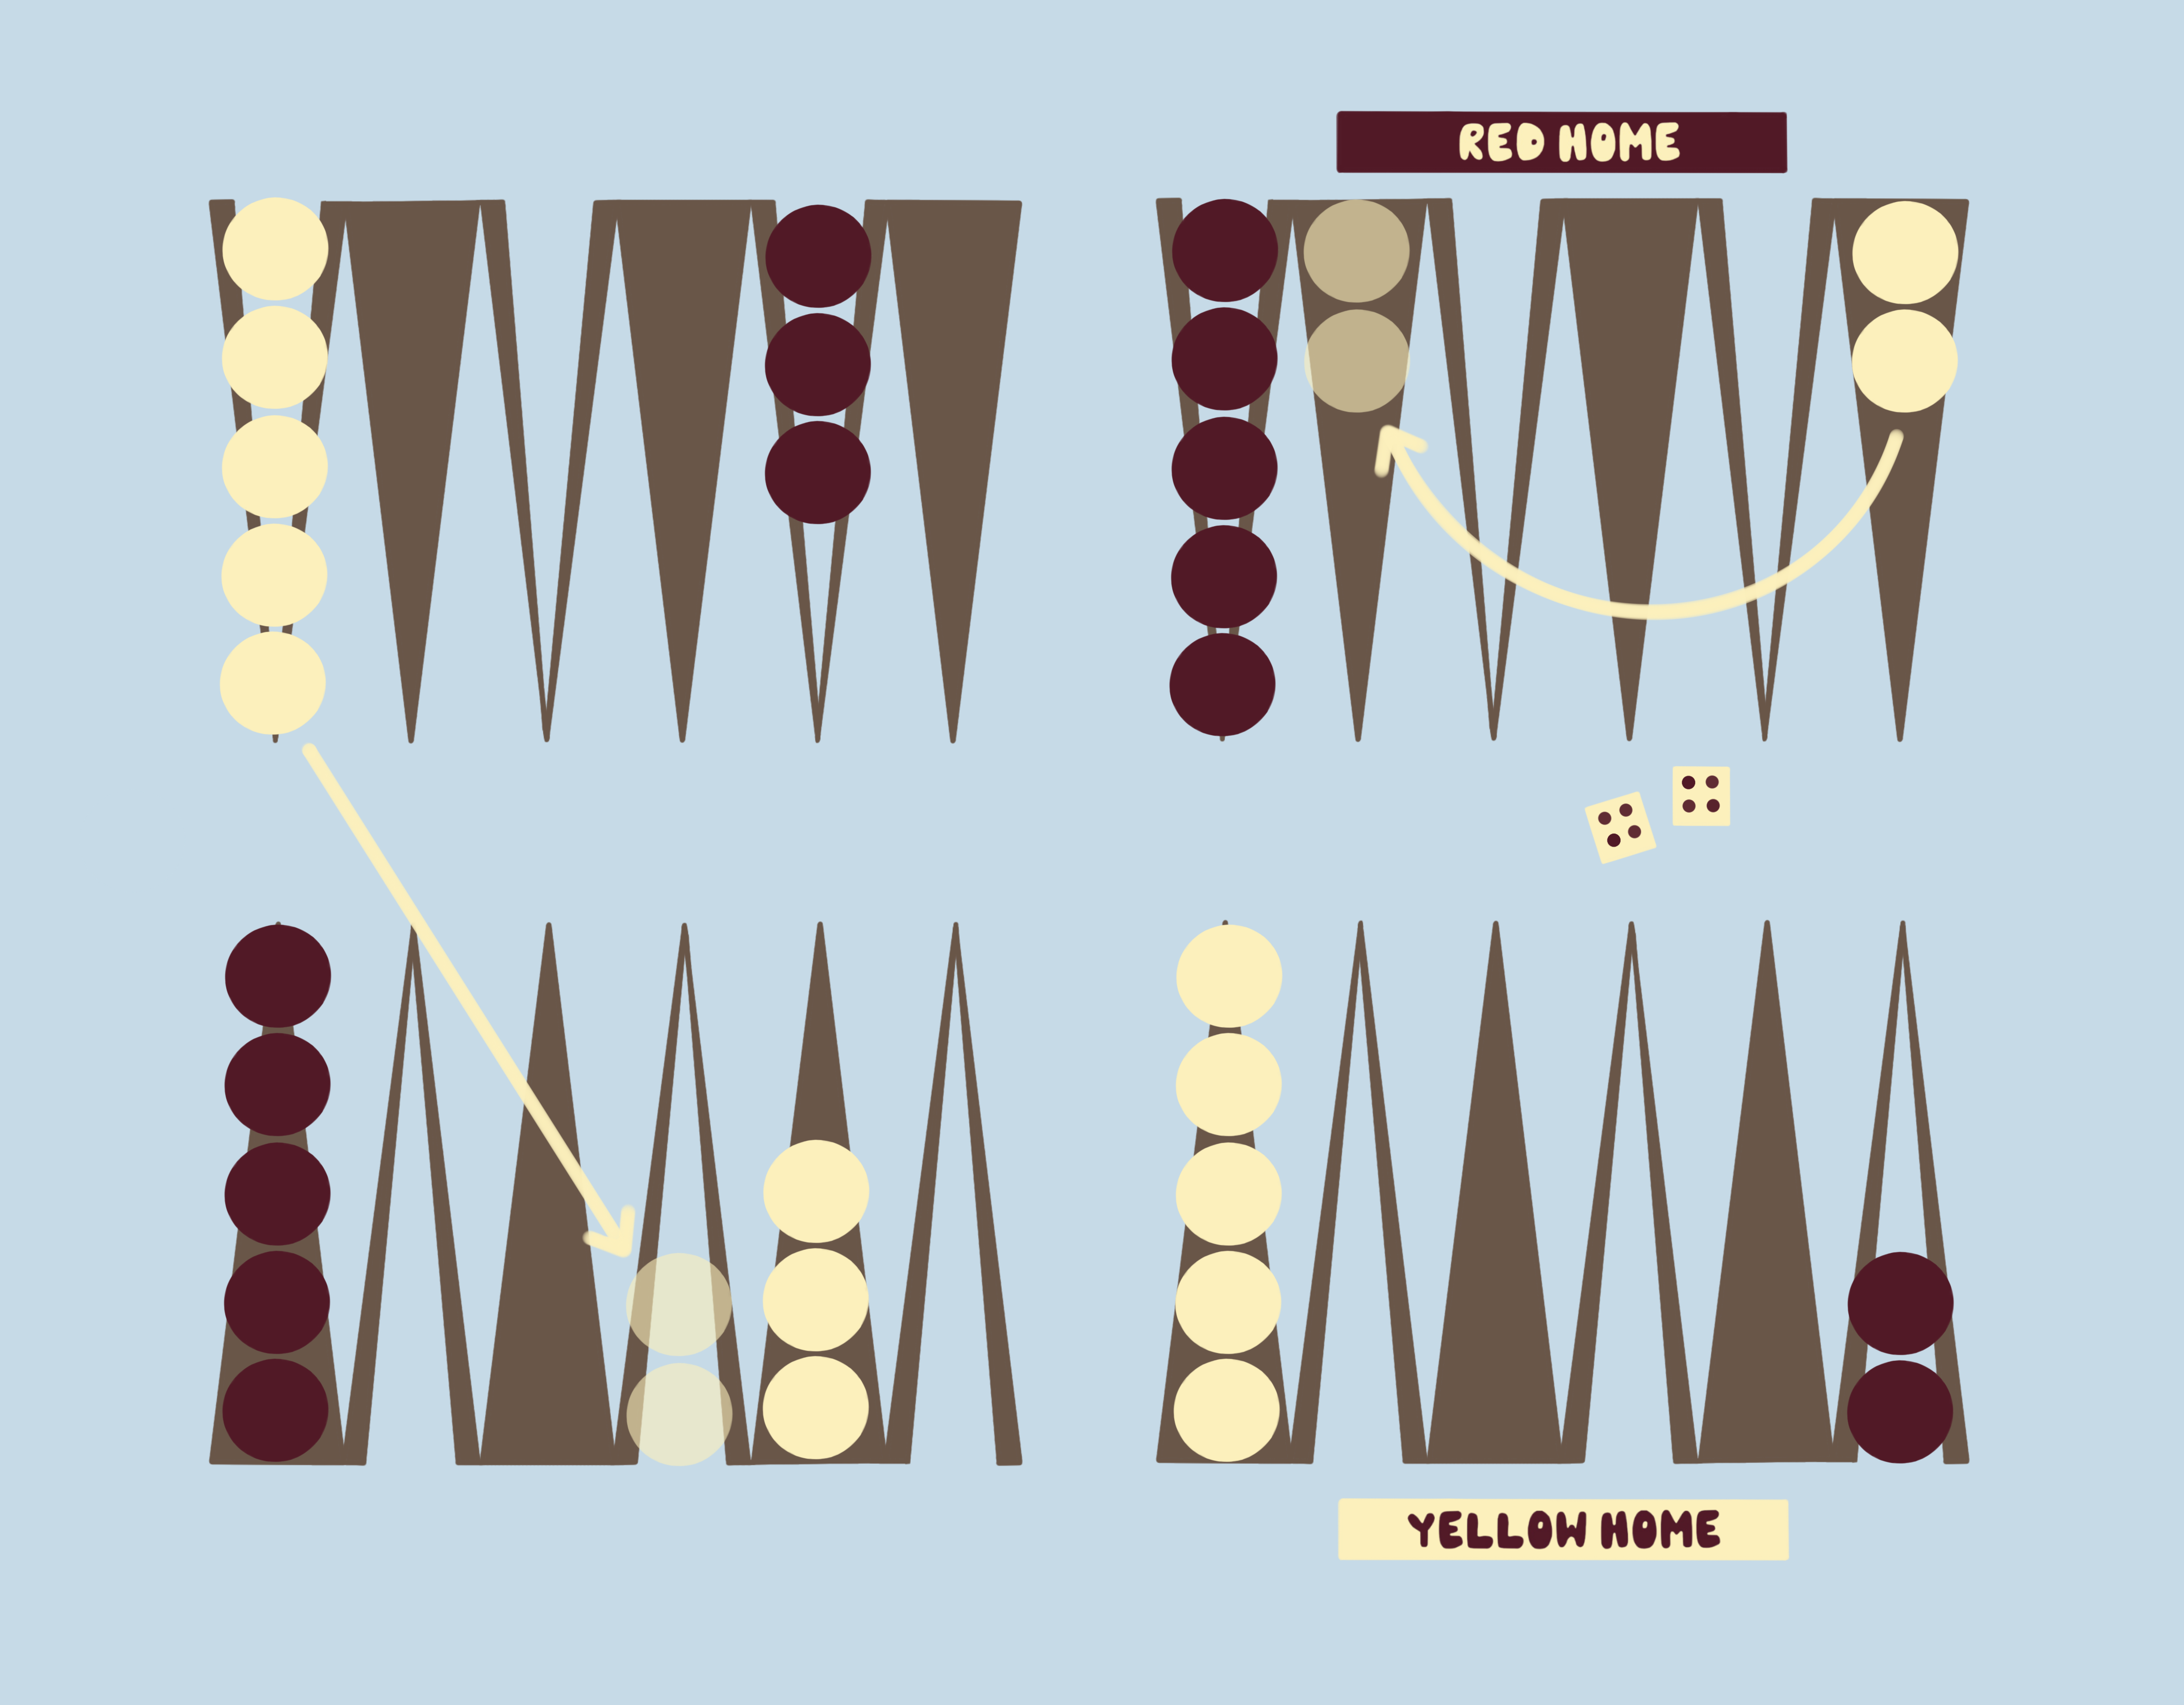
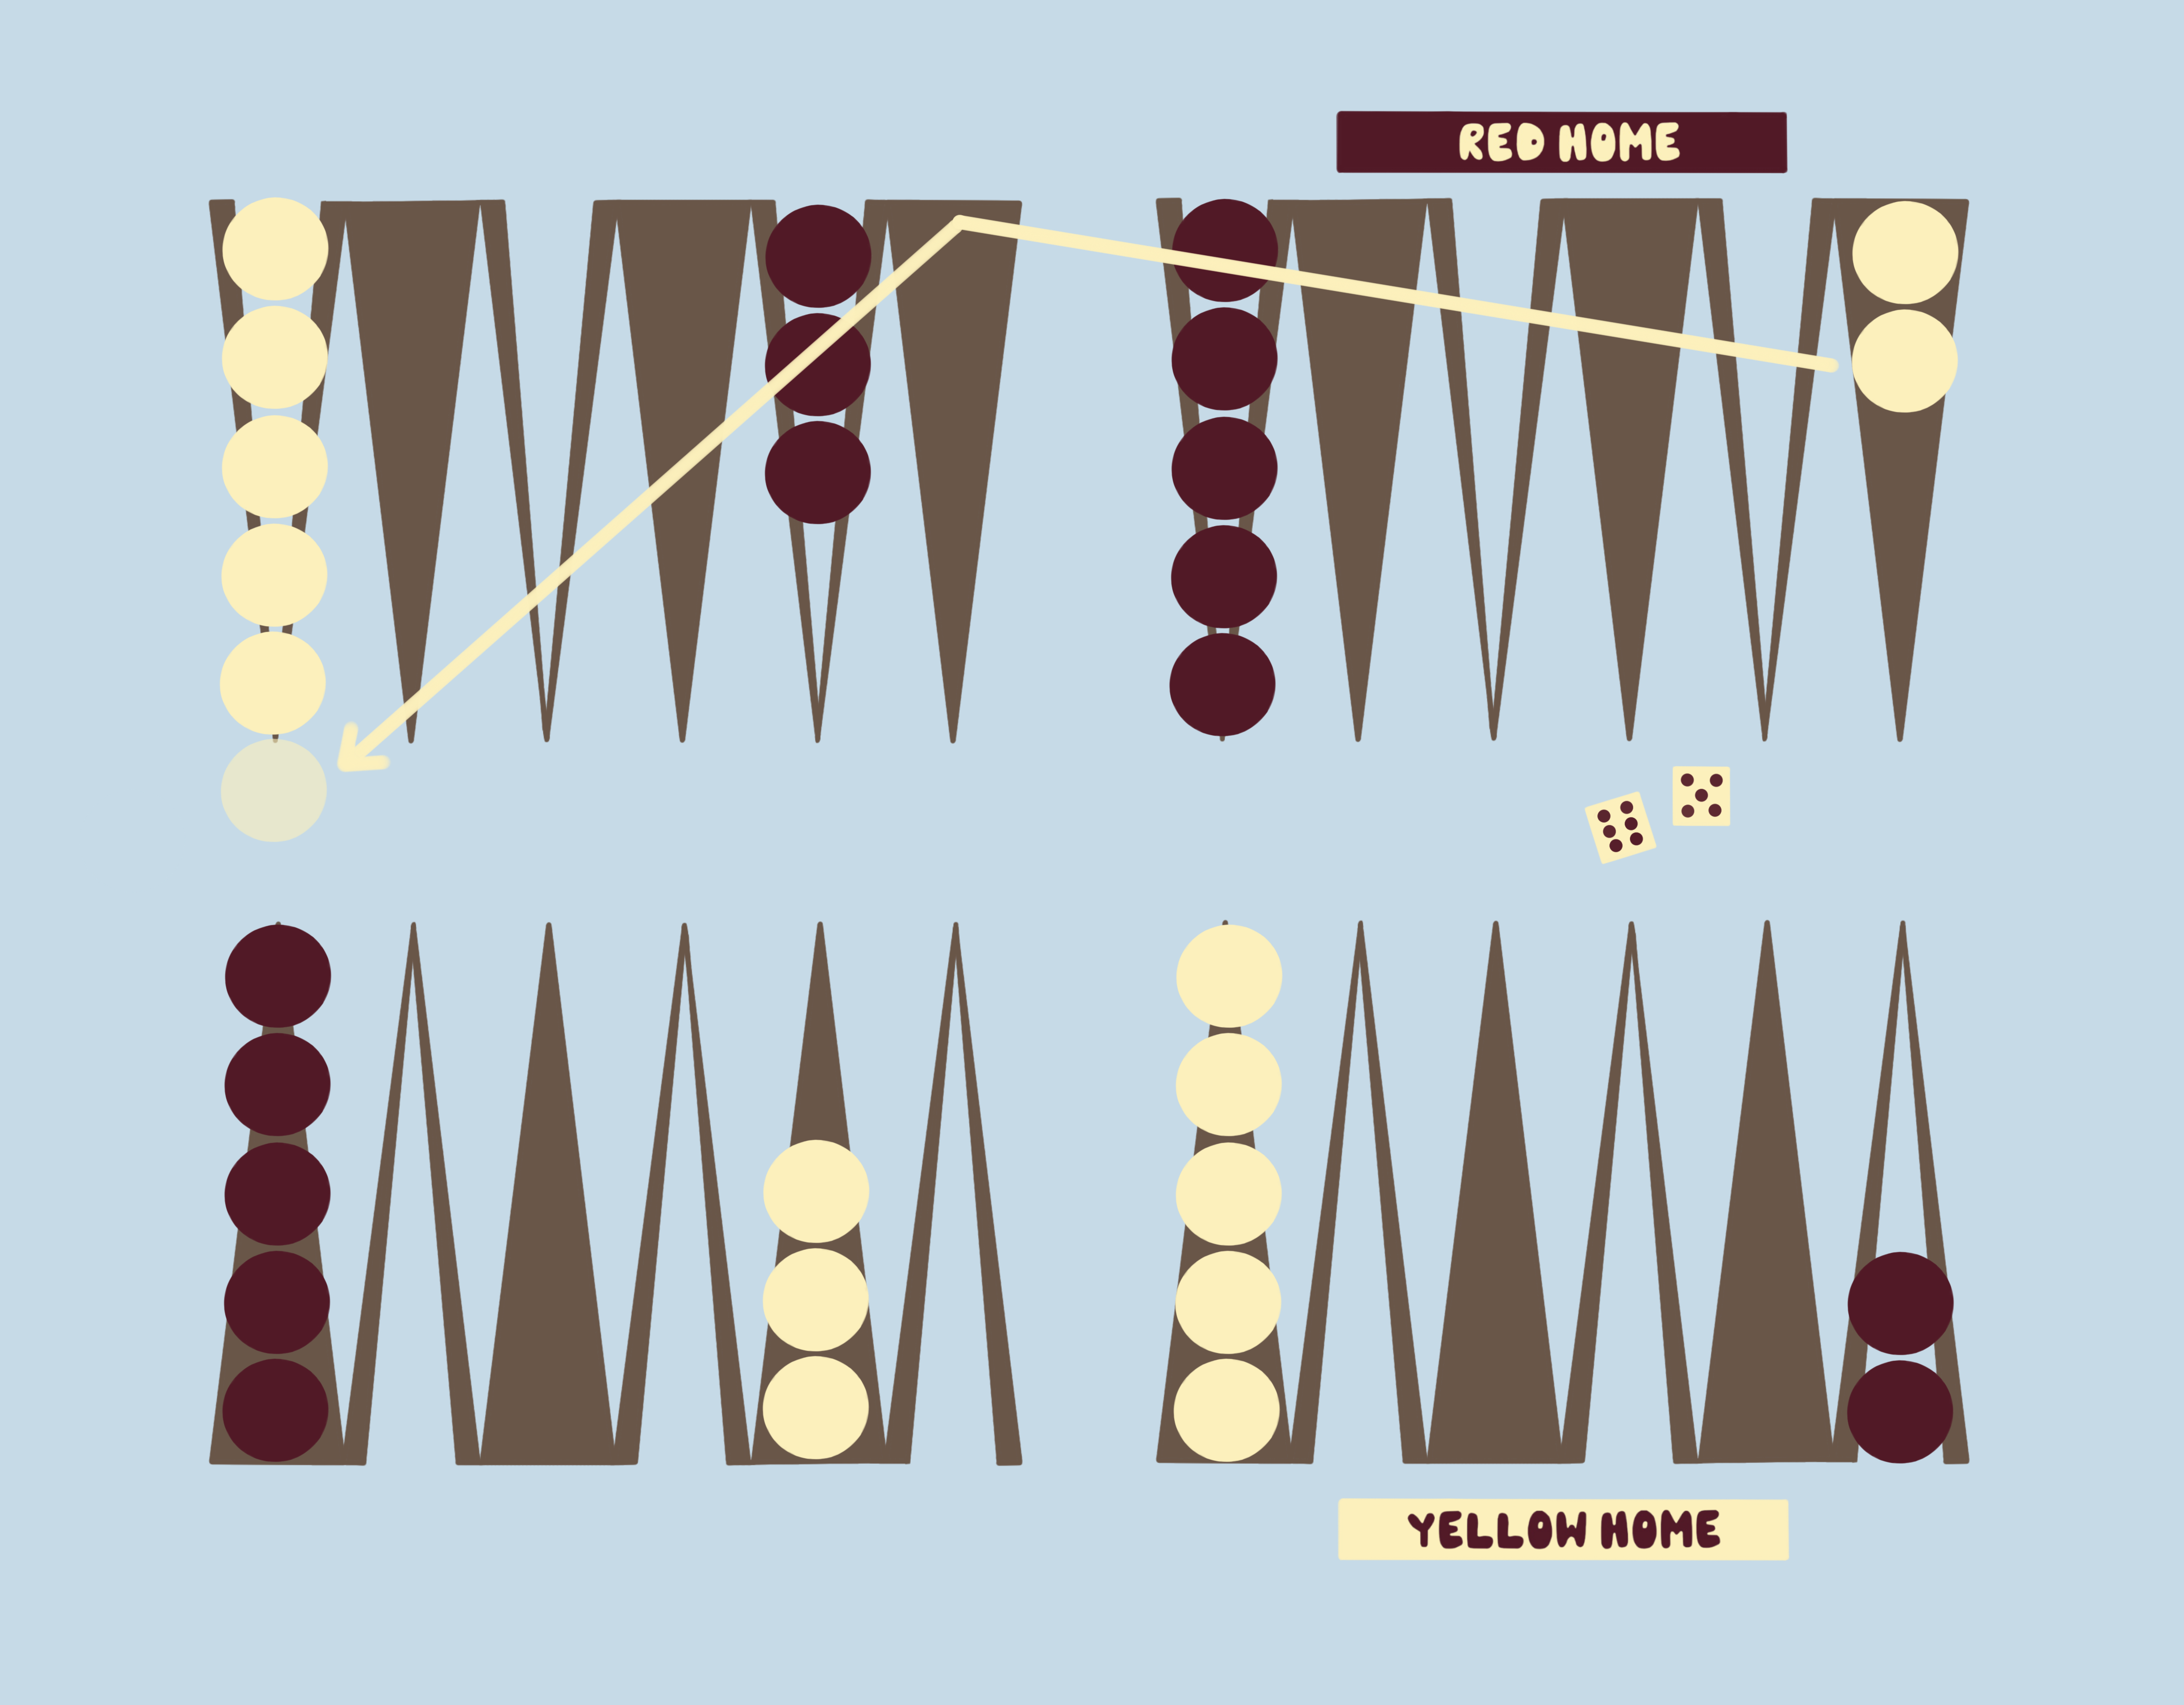
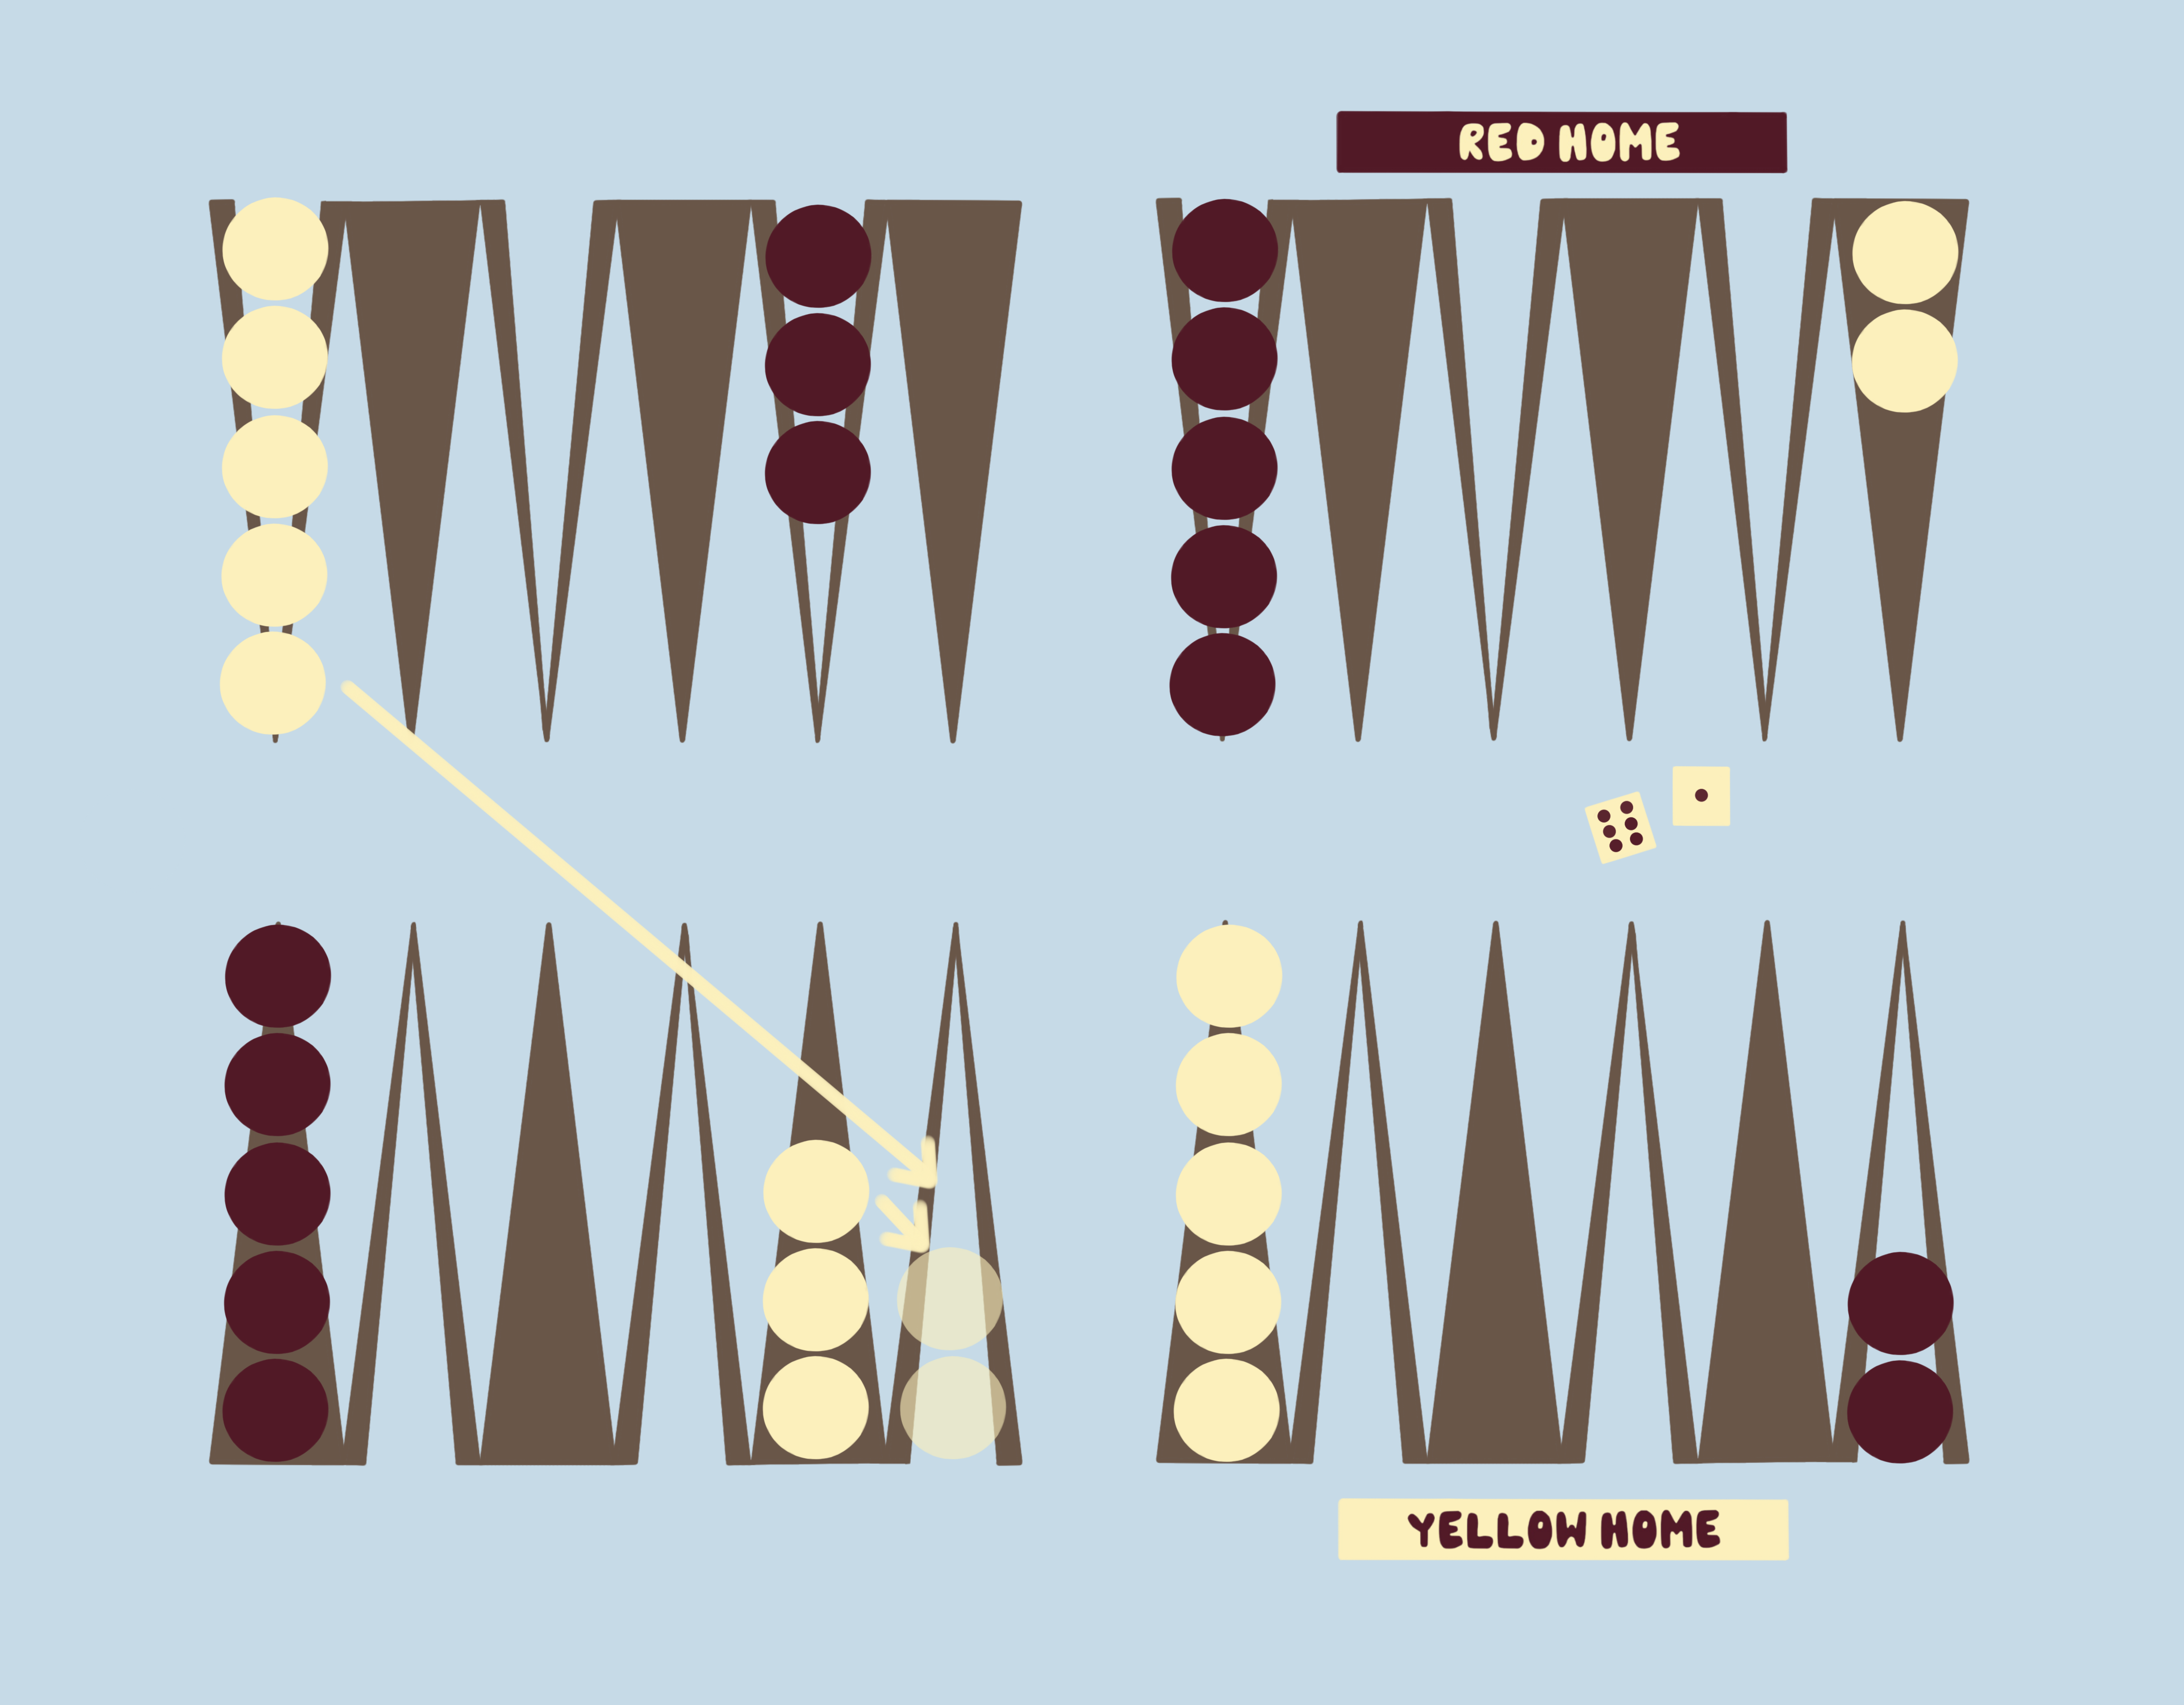
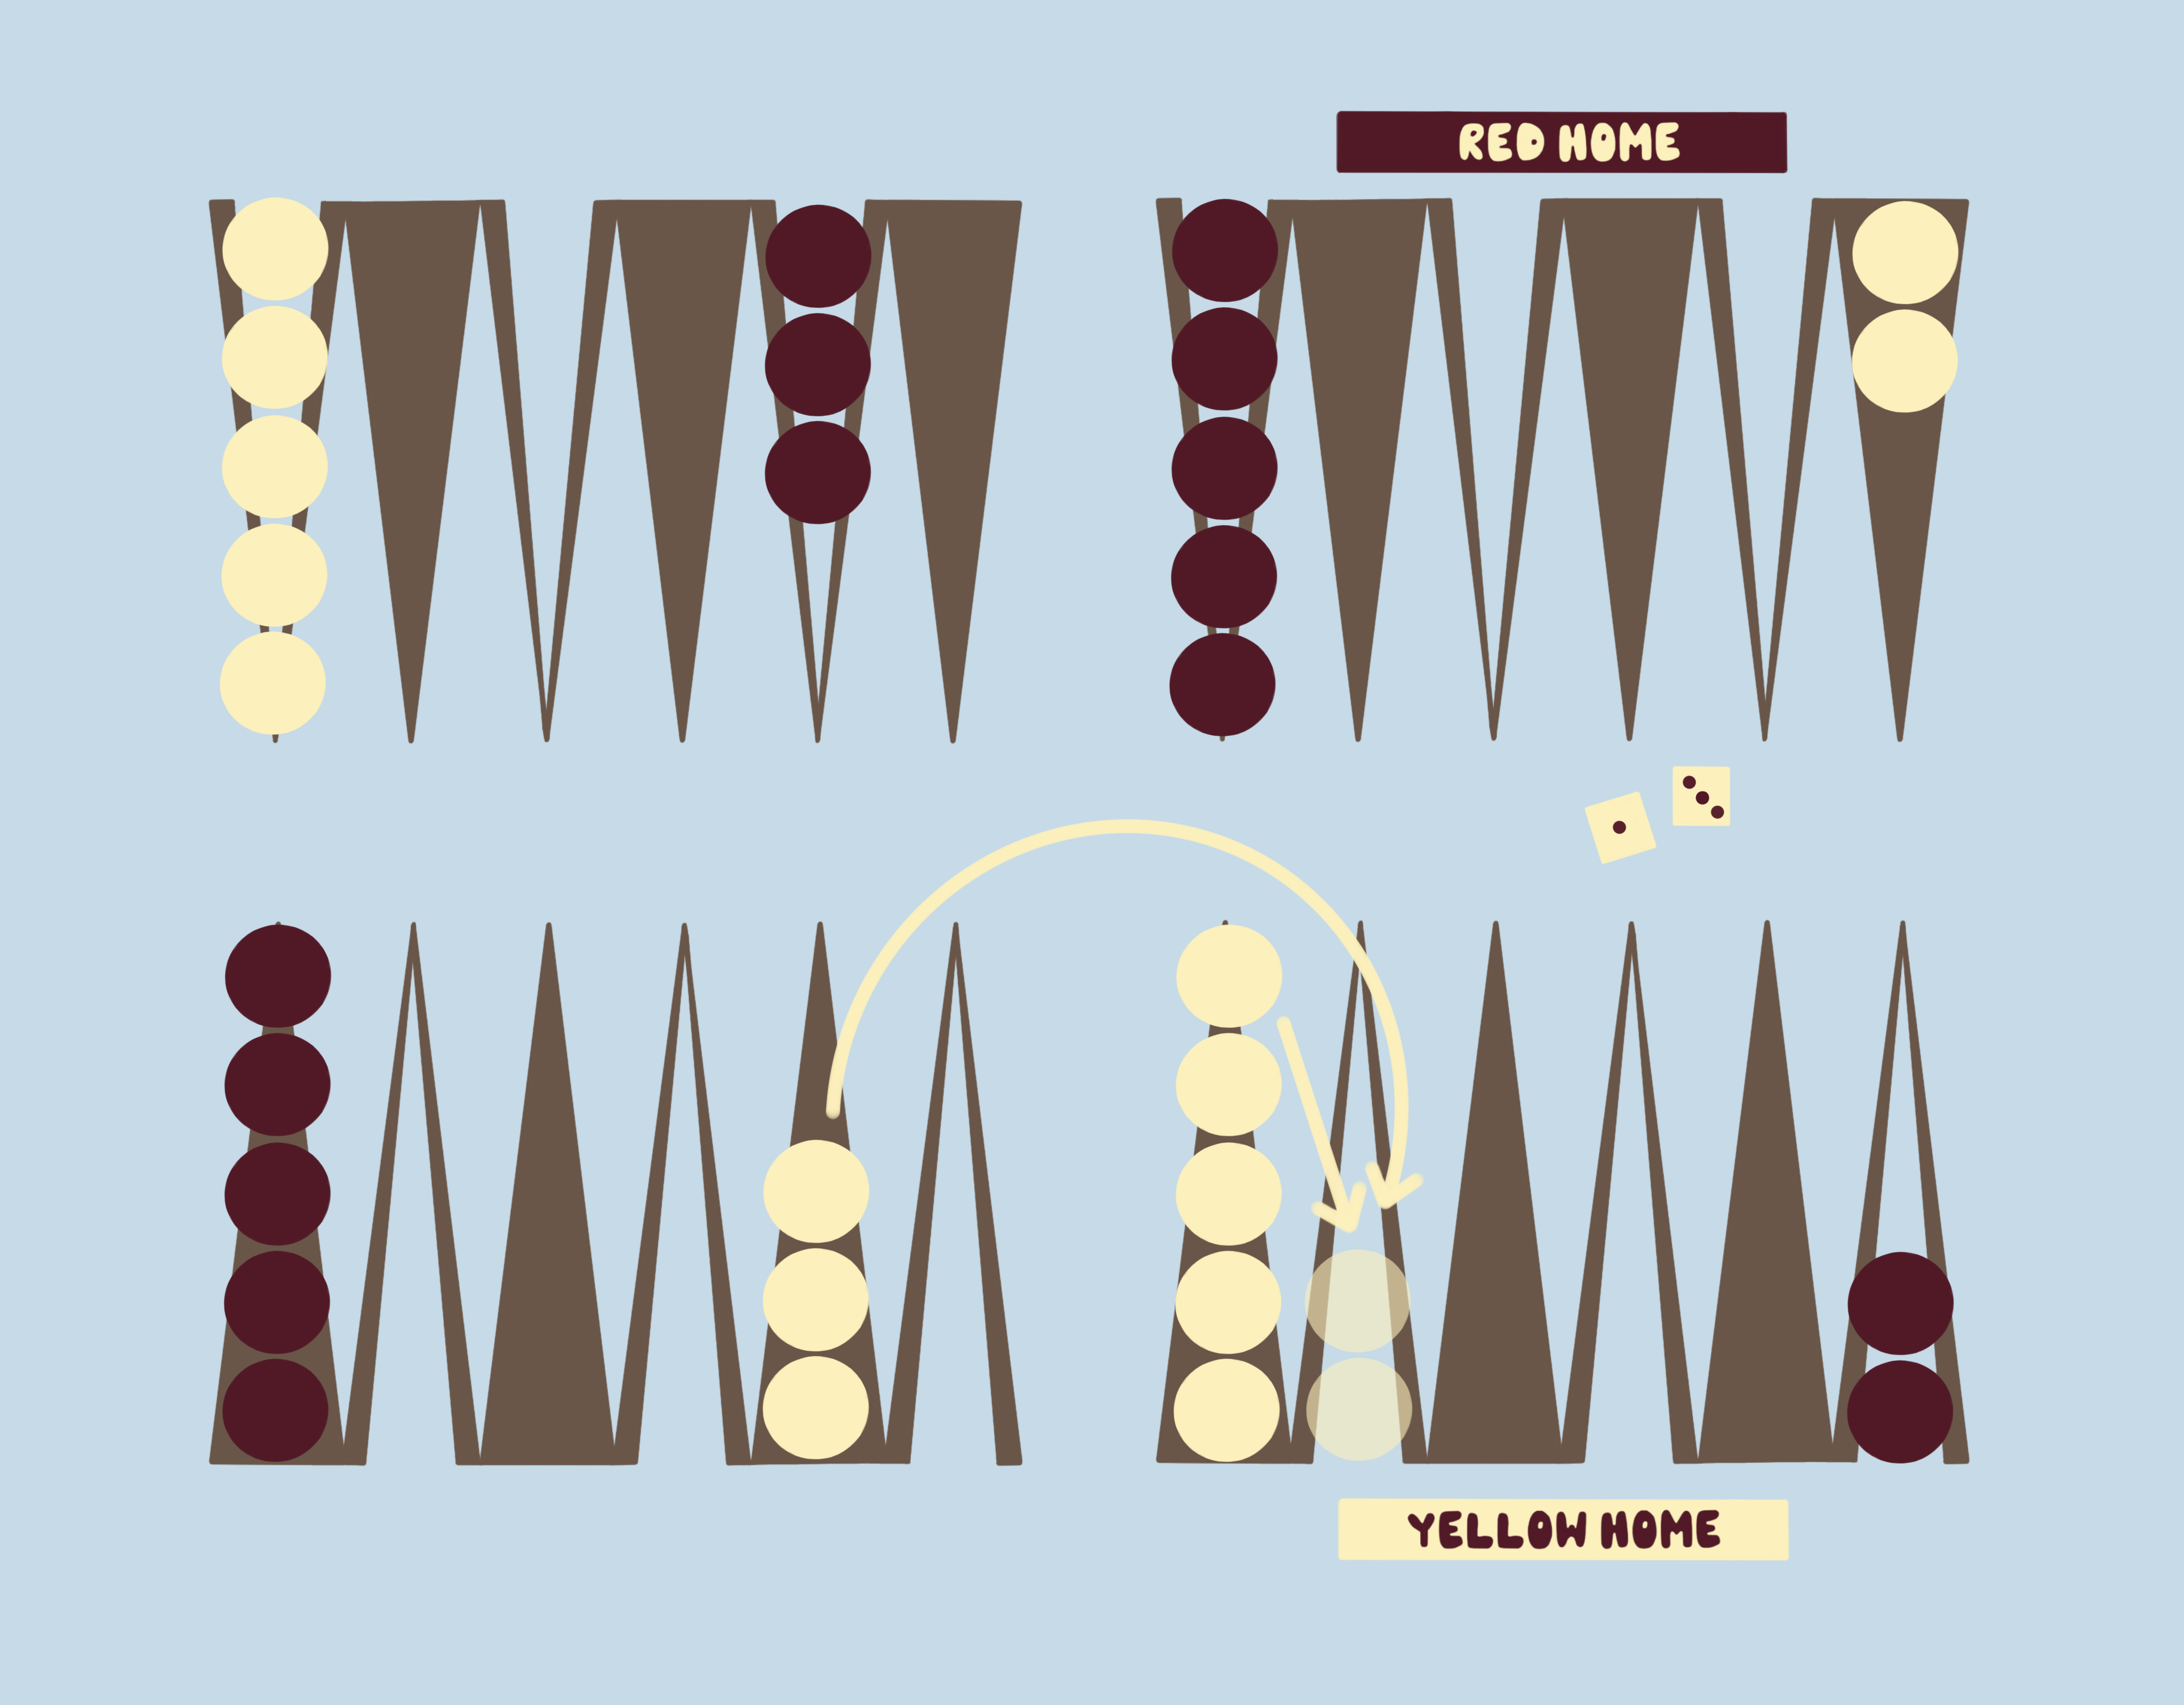
  • Roll both dice — move one checker the total or split between two
  • Roll doubles = 4 moves instead of 2
  • You must use as many dice as possible each turn
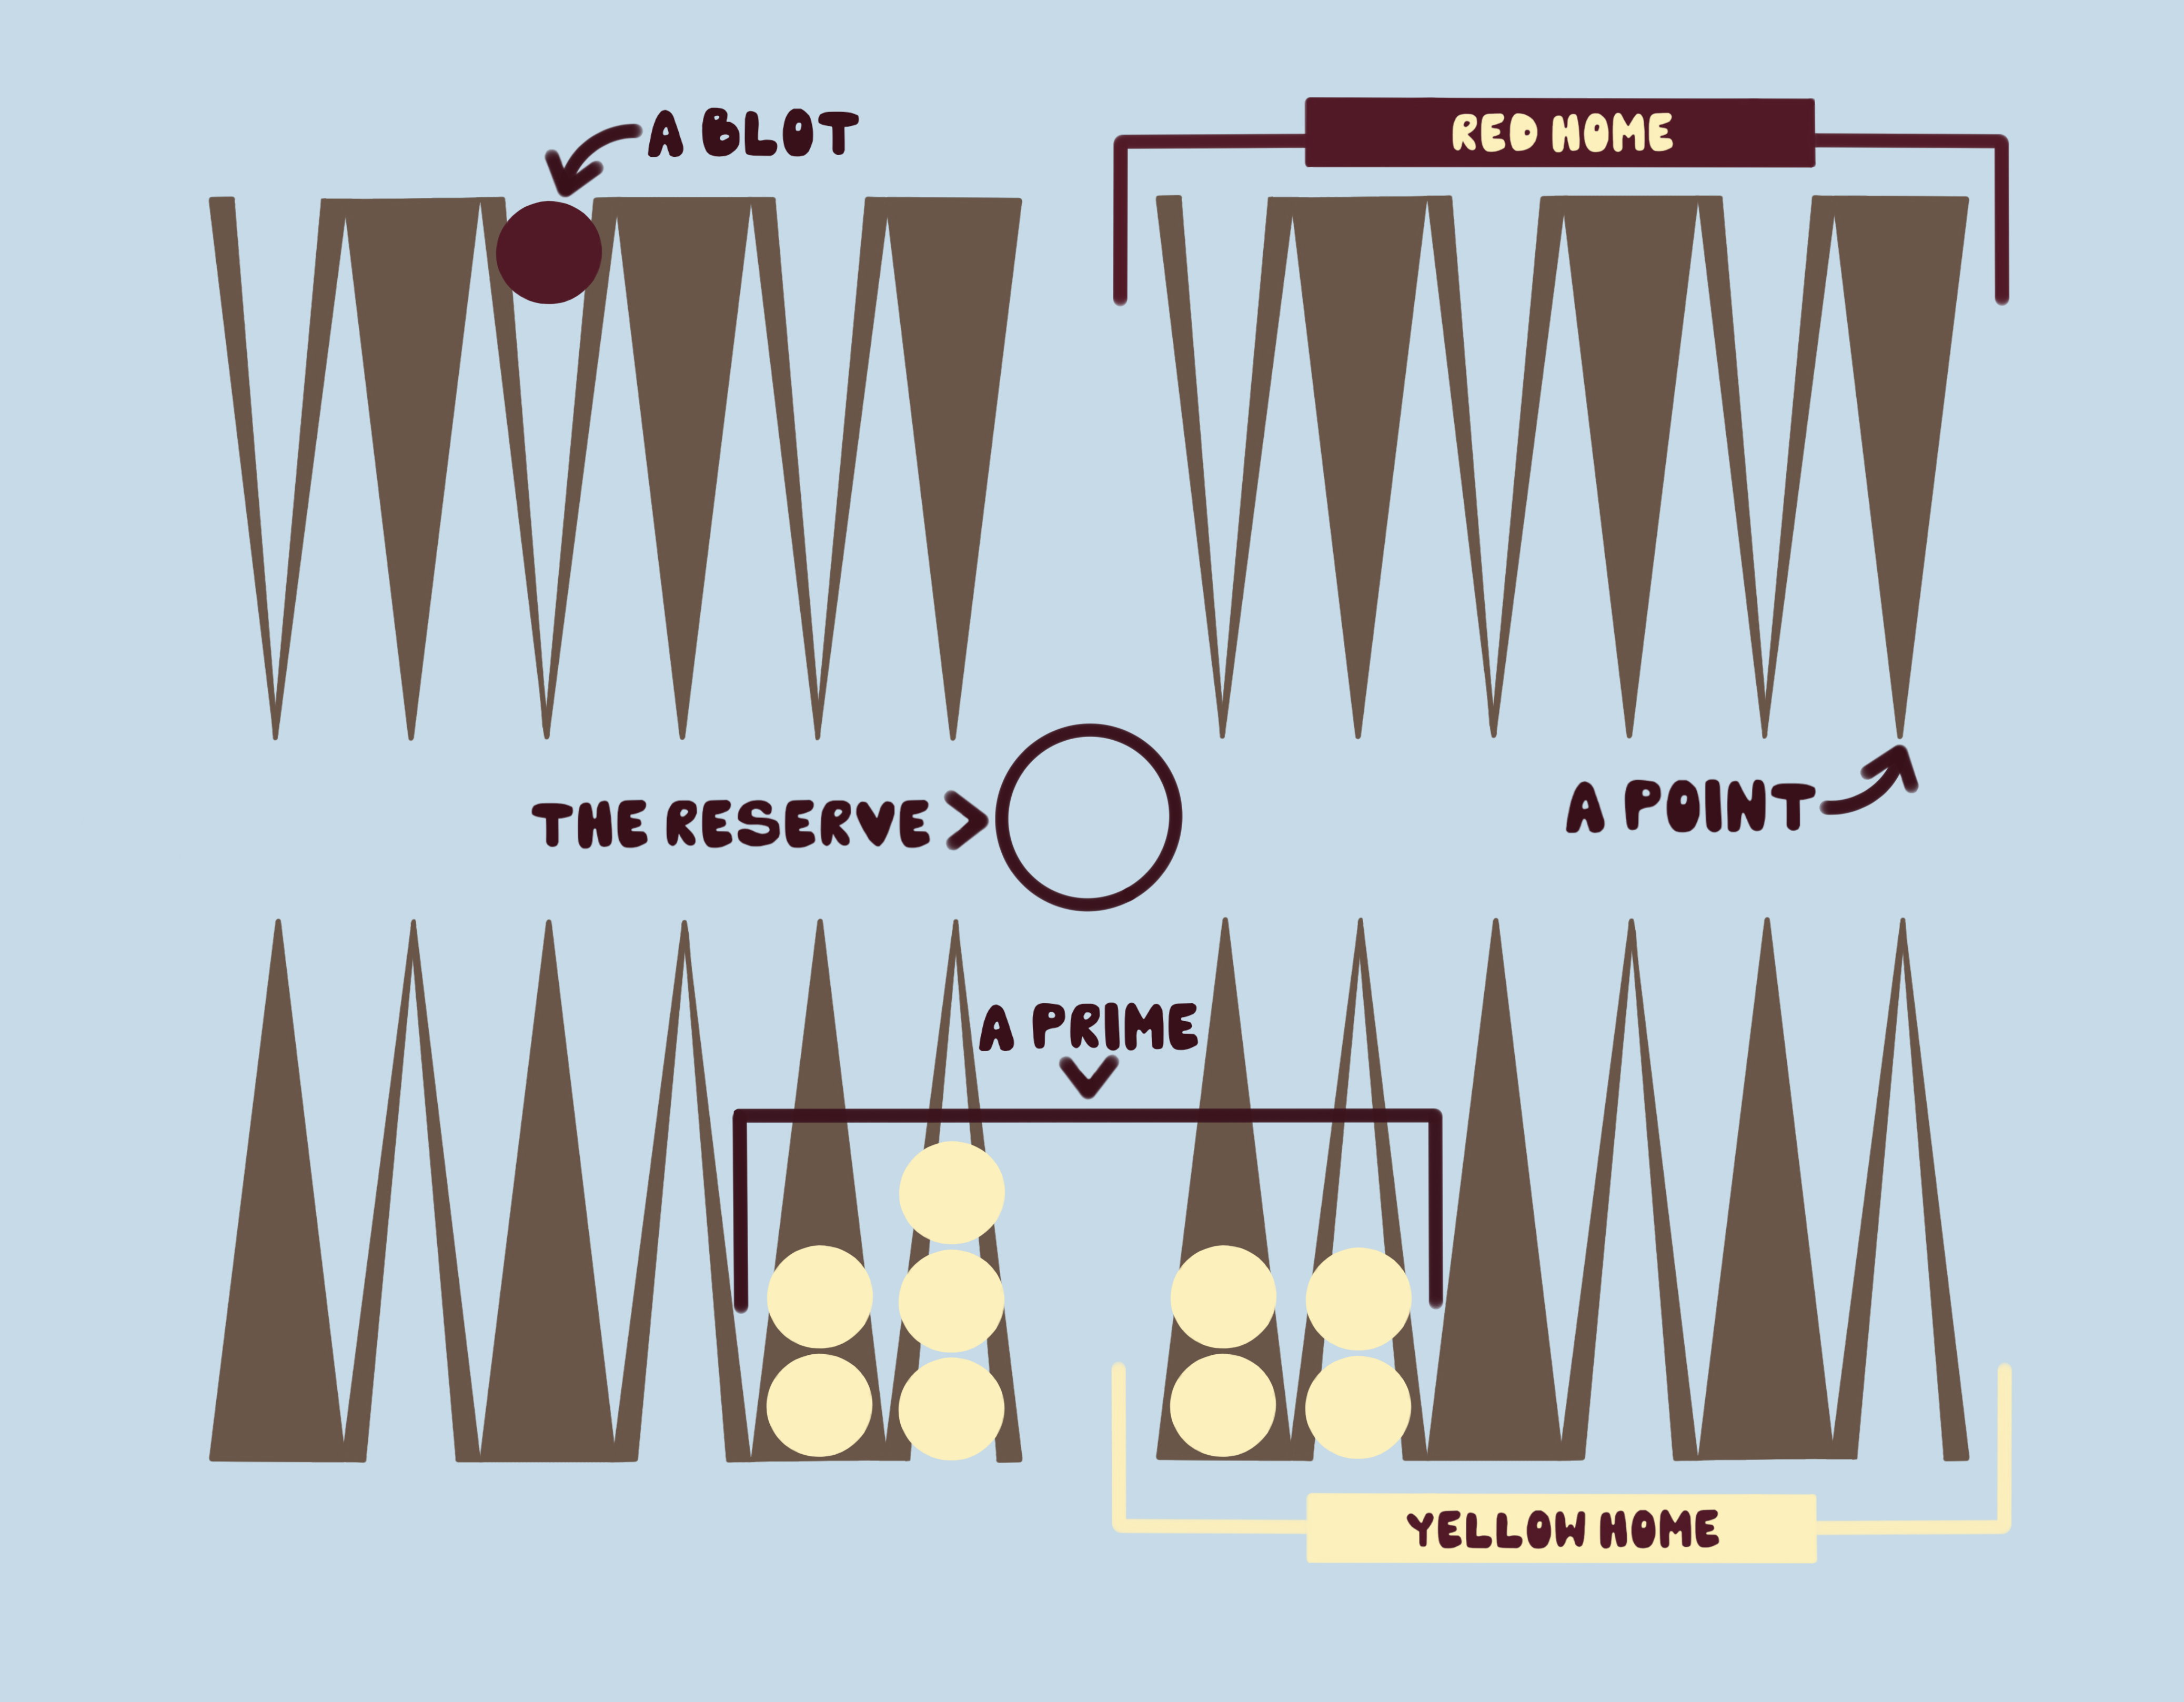
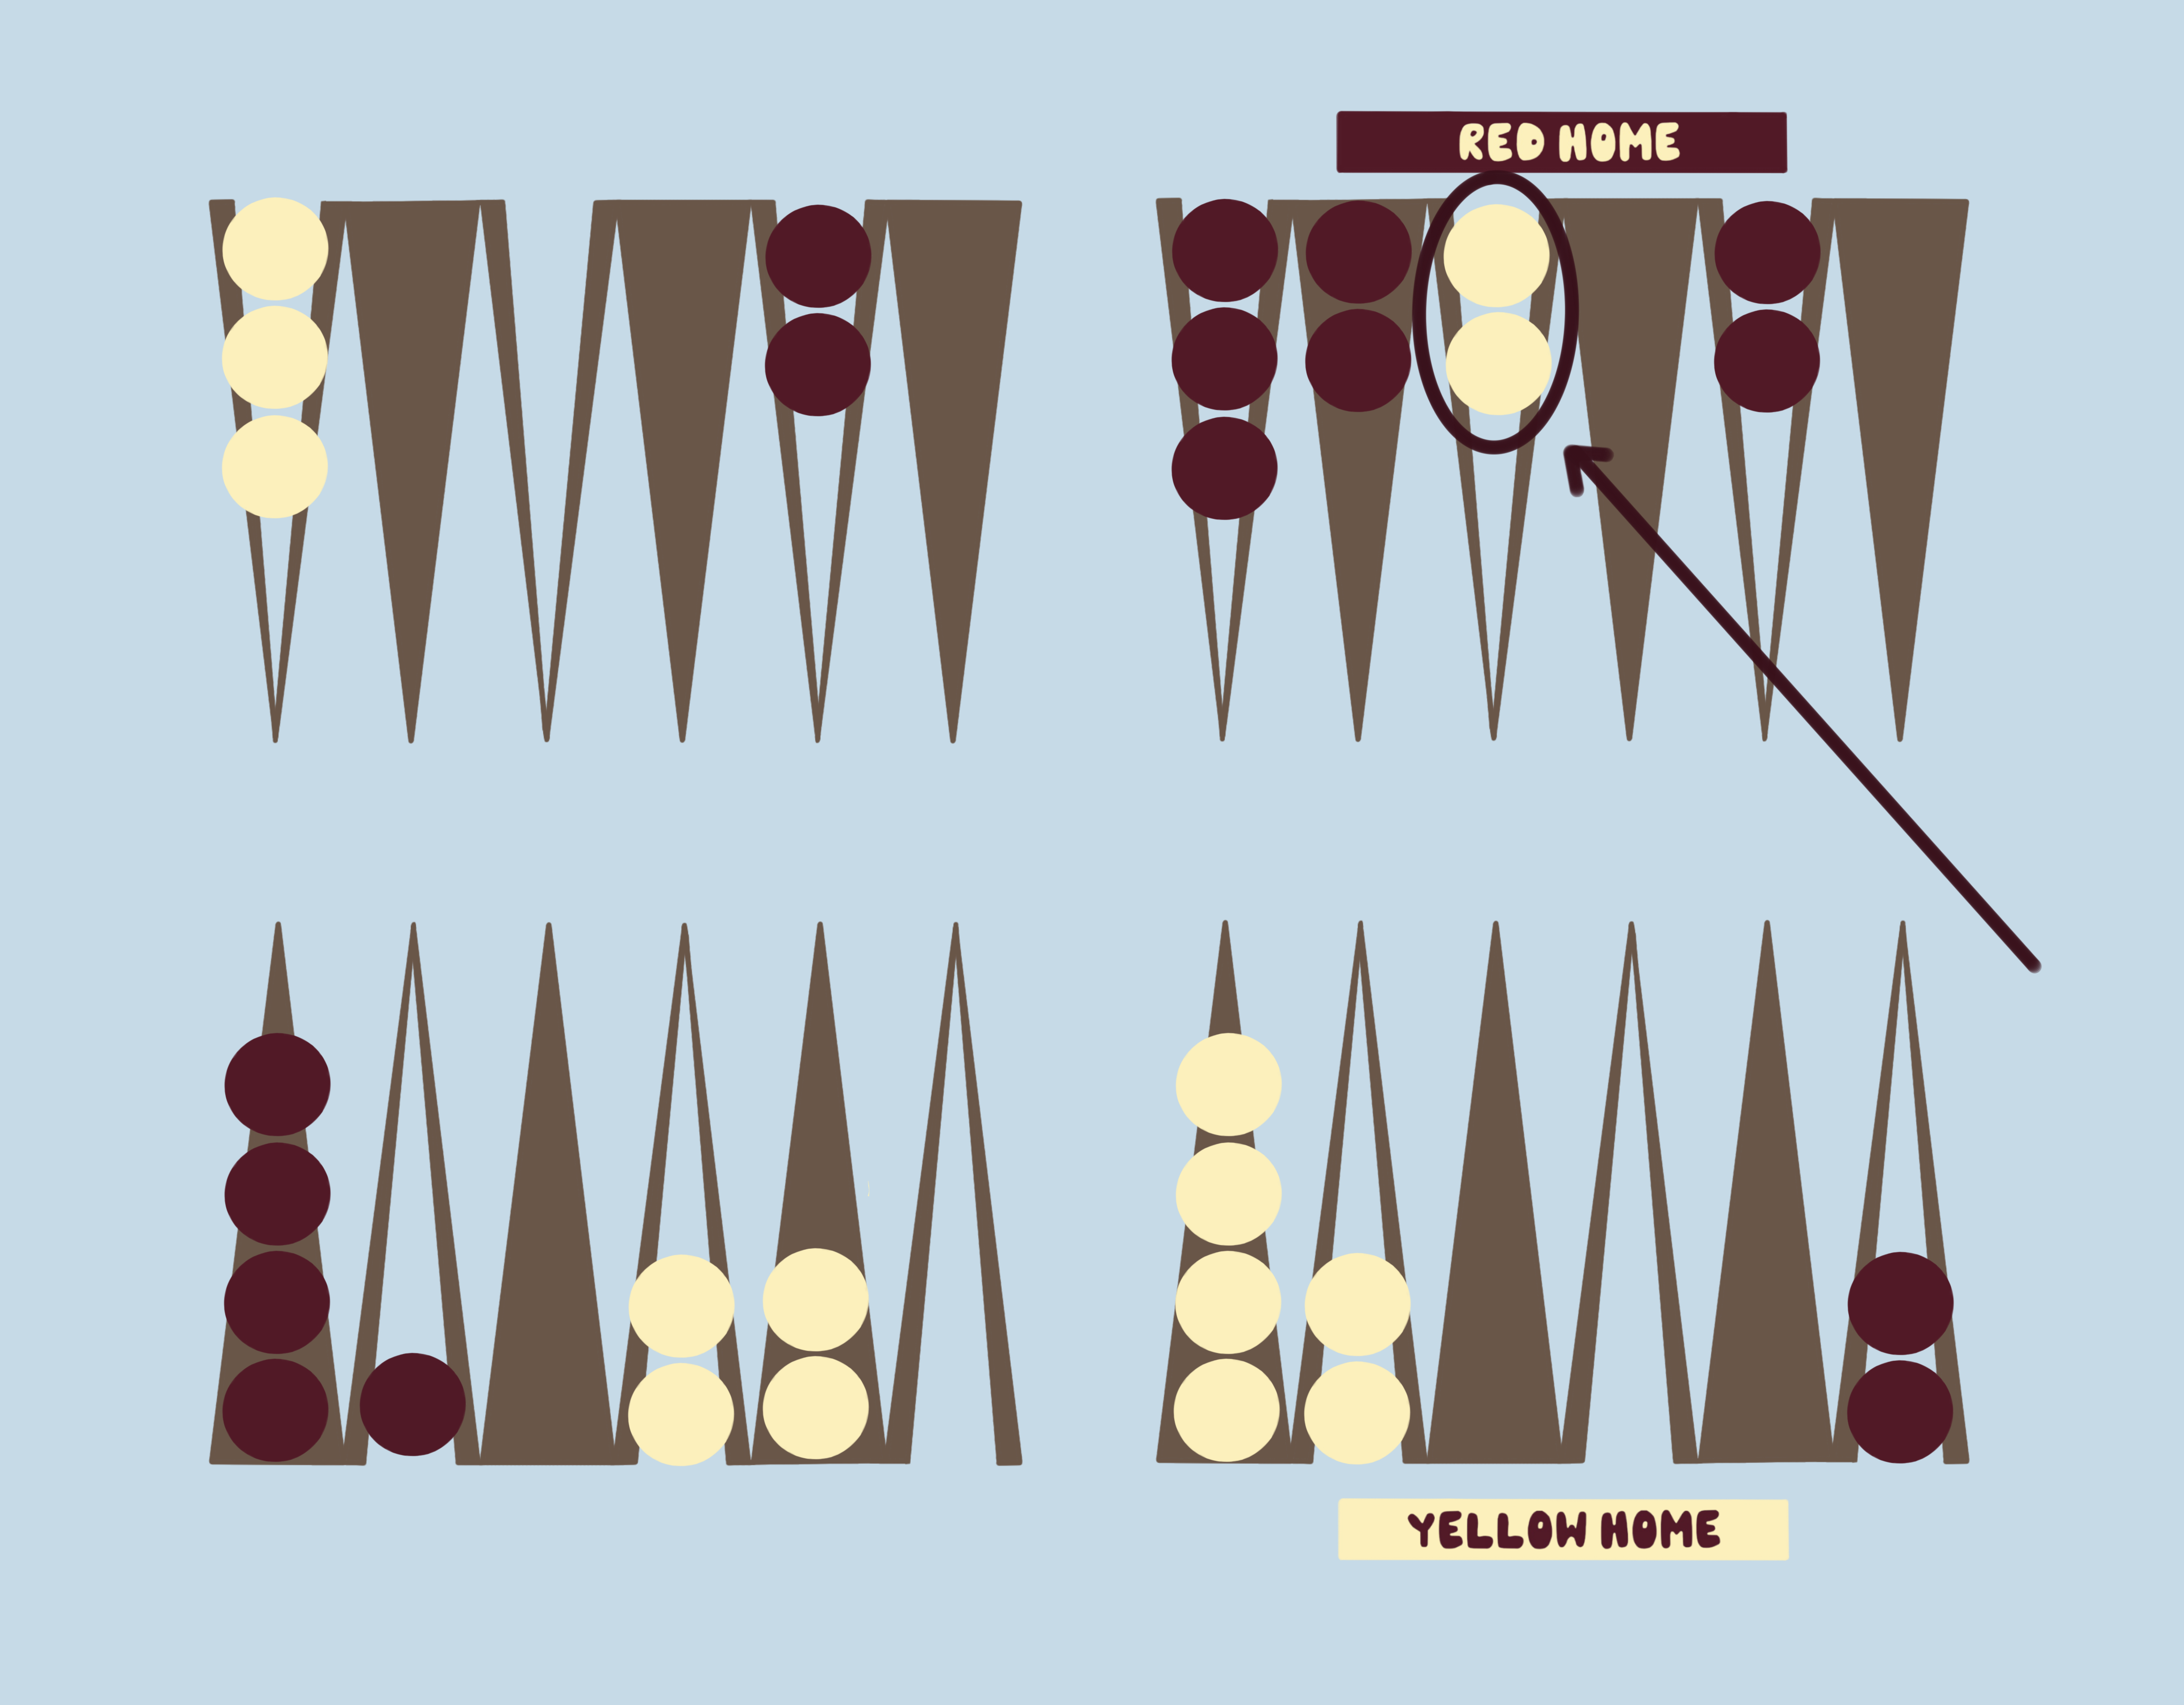
Owning a Point

  • 2 or more checkers on a point = you own it
  • Your opponent can't land there
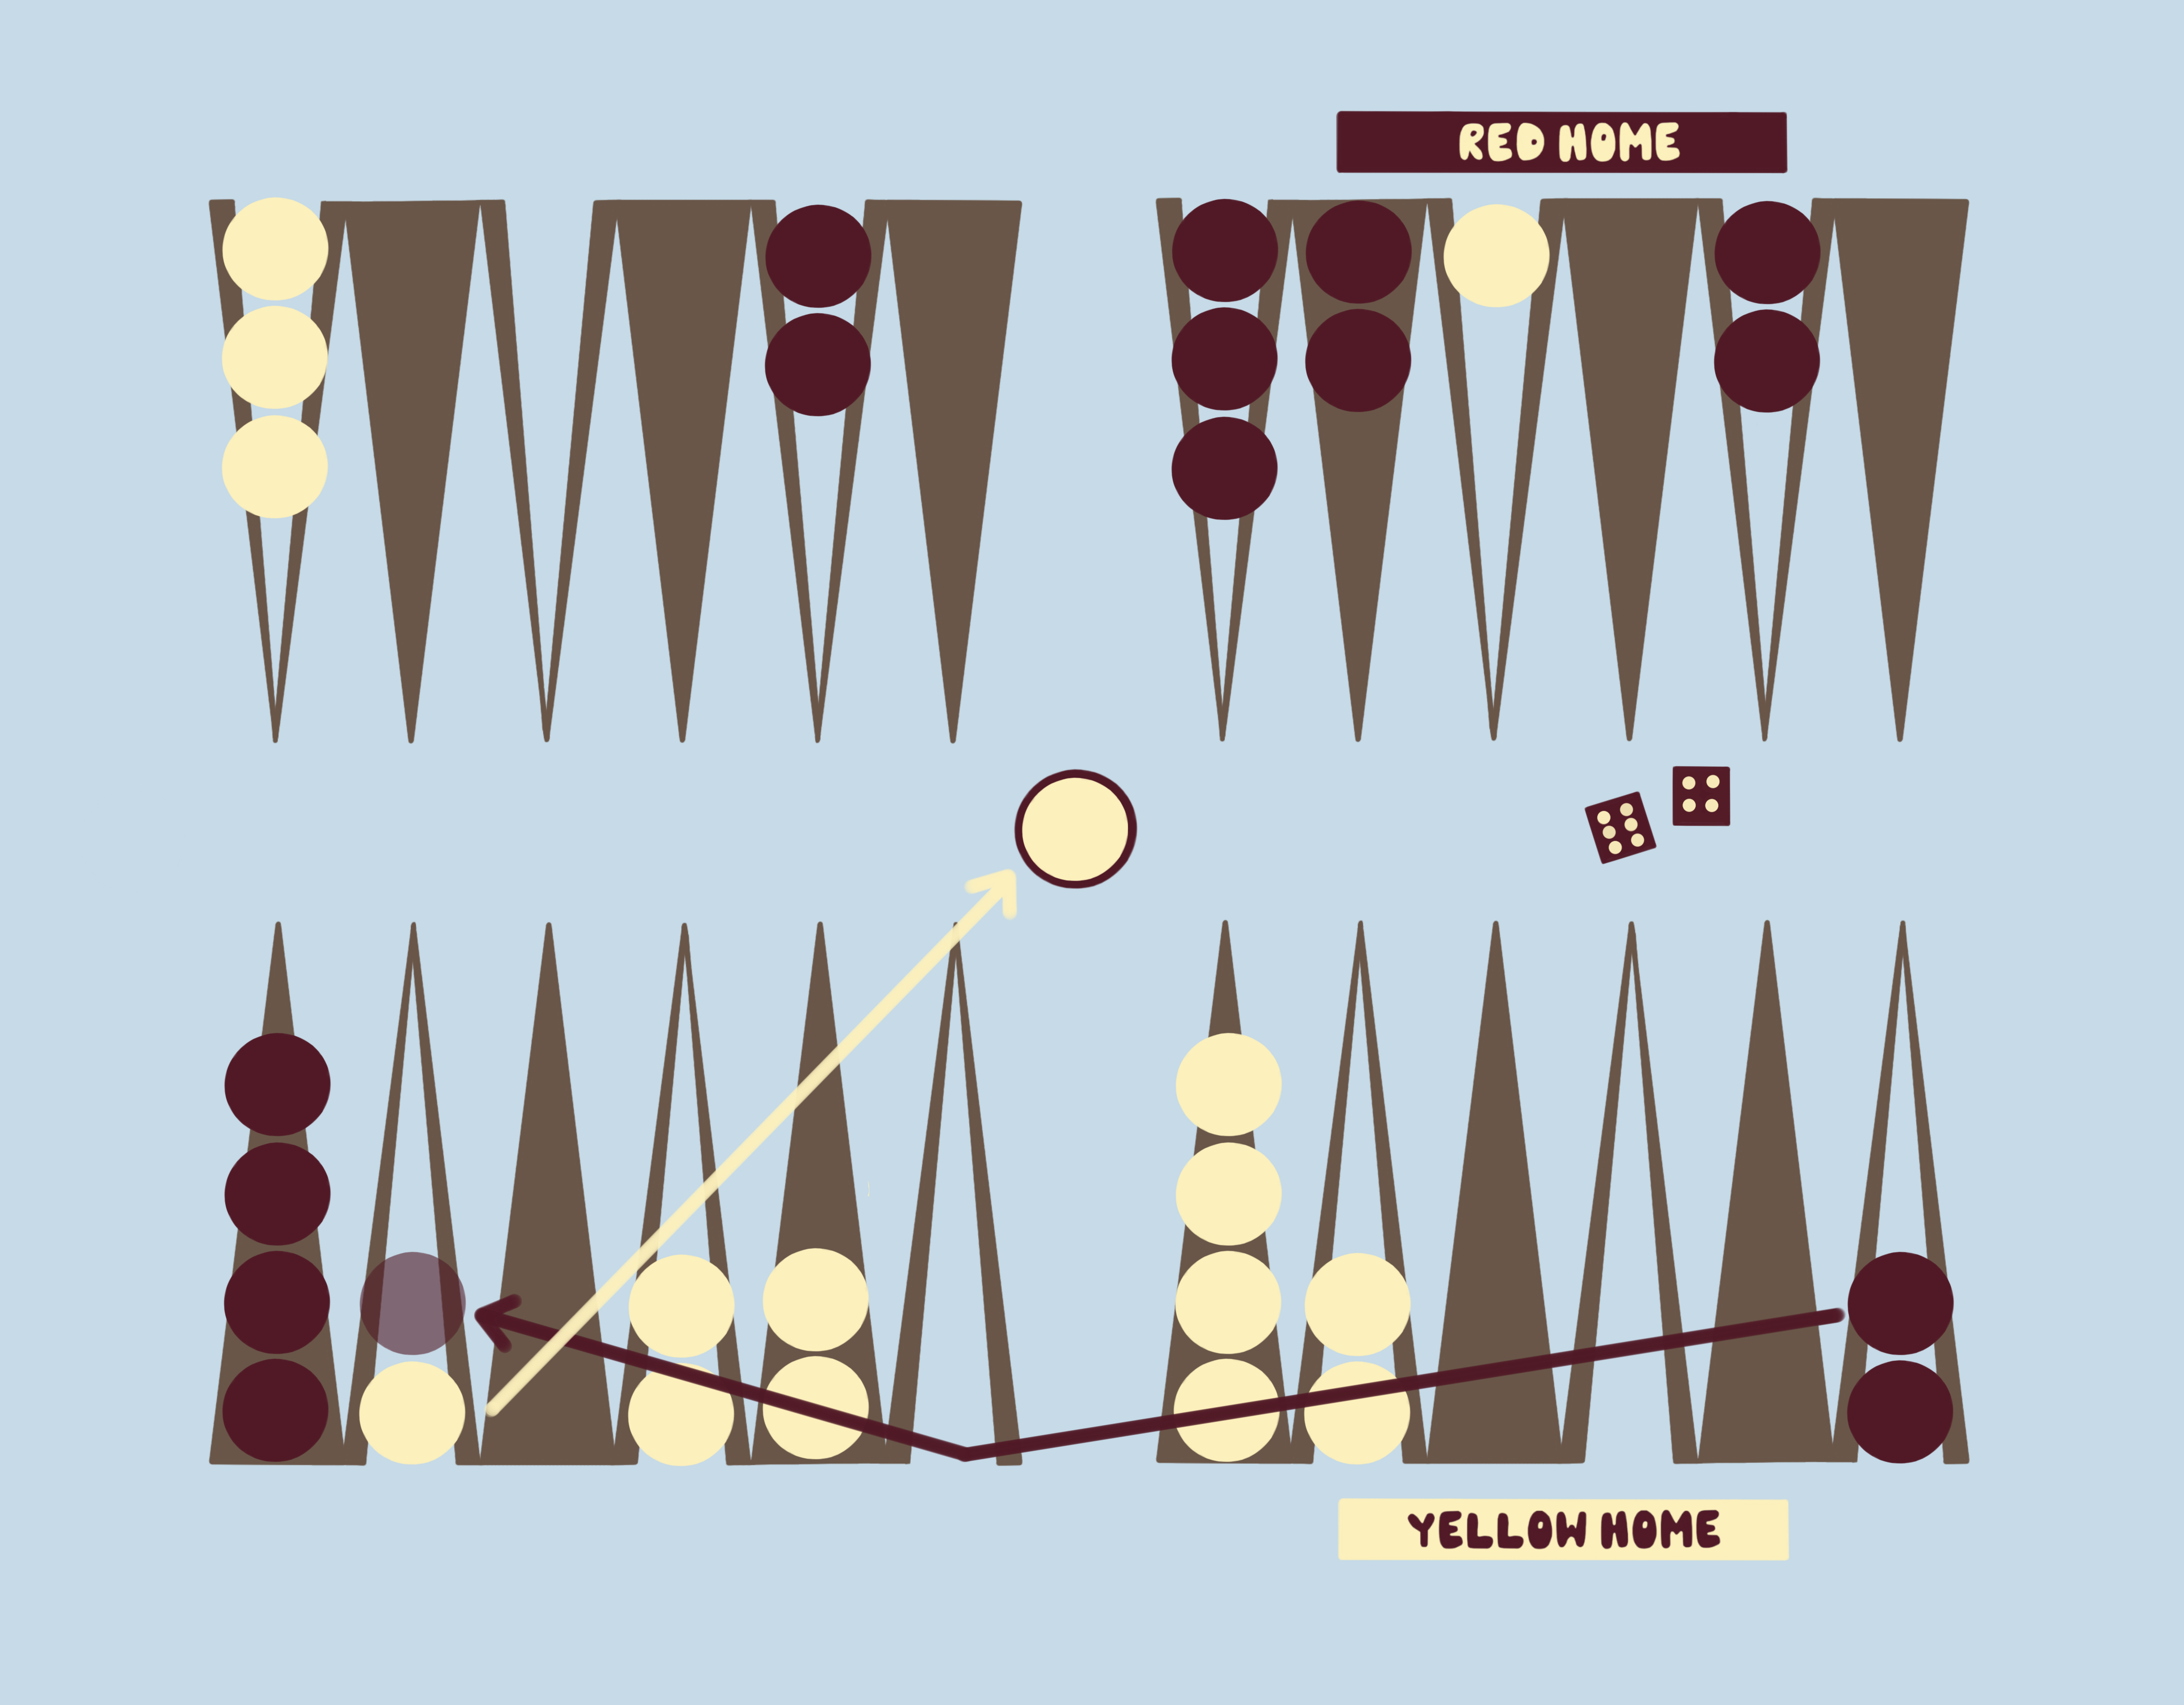
  • A lone checker (a blot) is vulnerable — it can be hit
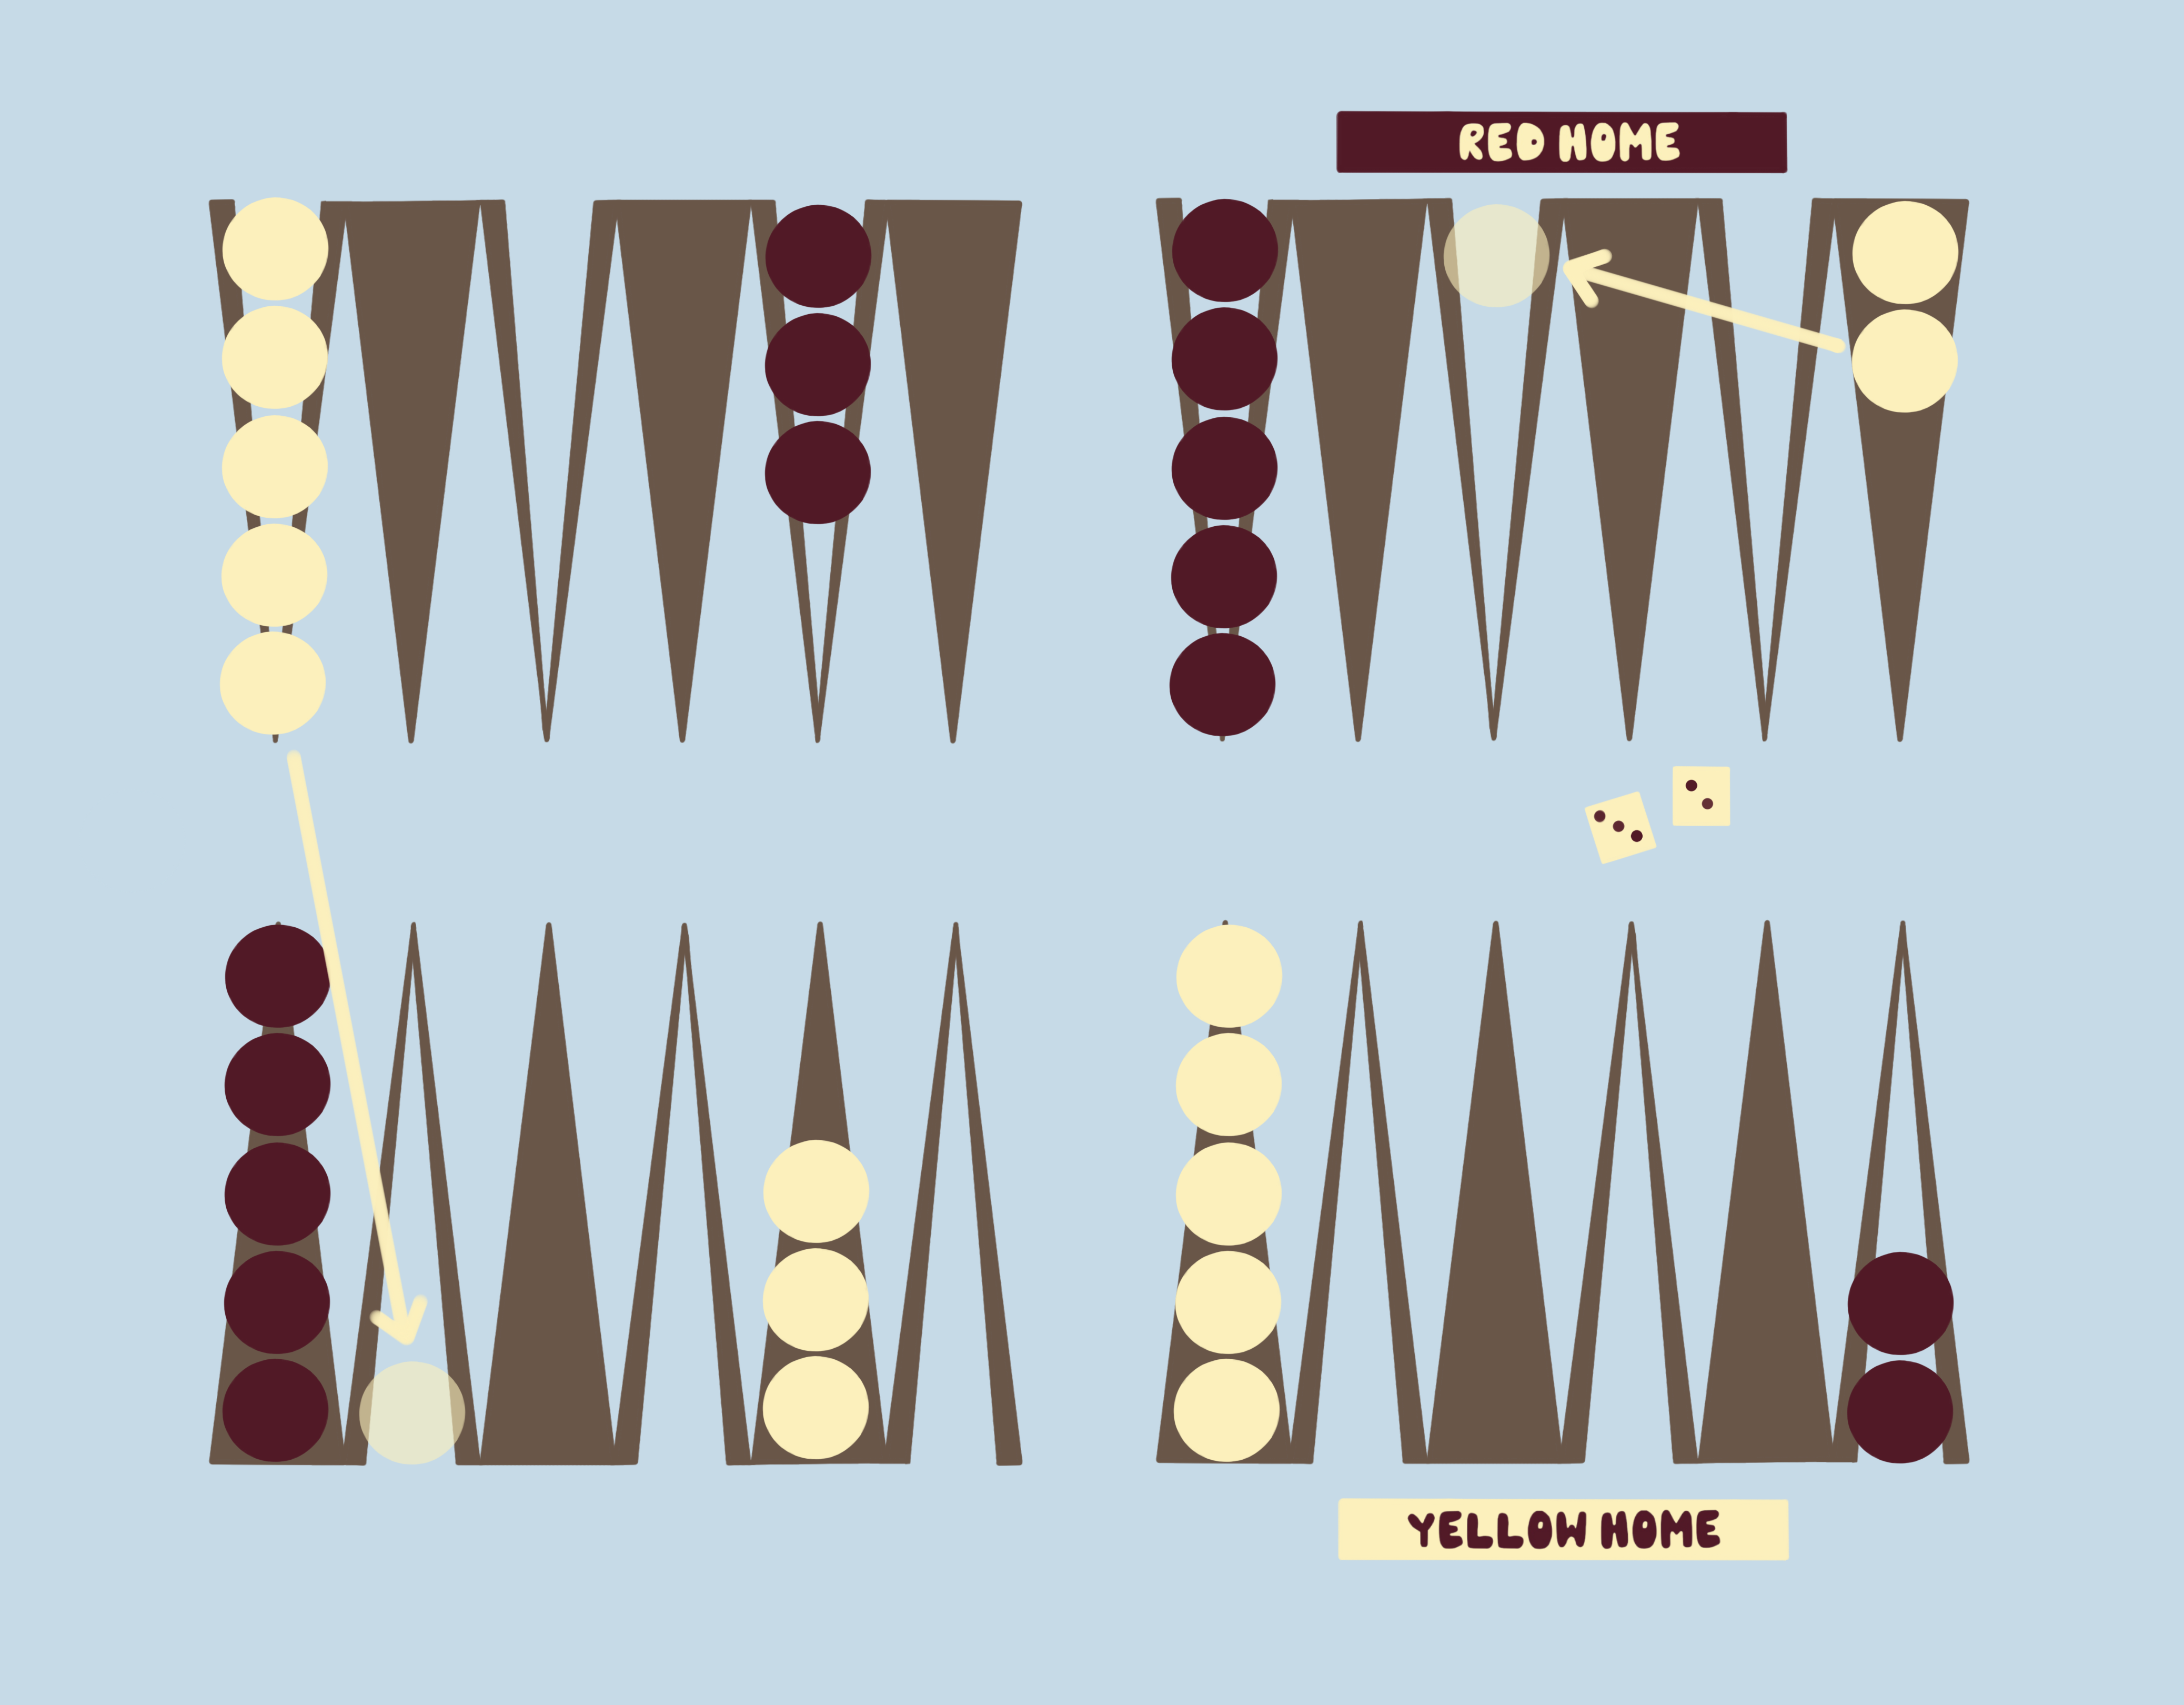
Hitting

  • Land on a lone opponent checker to send it to the Reserve
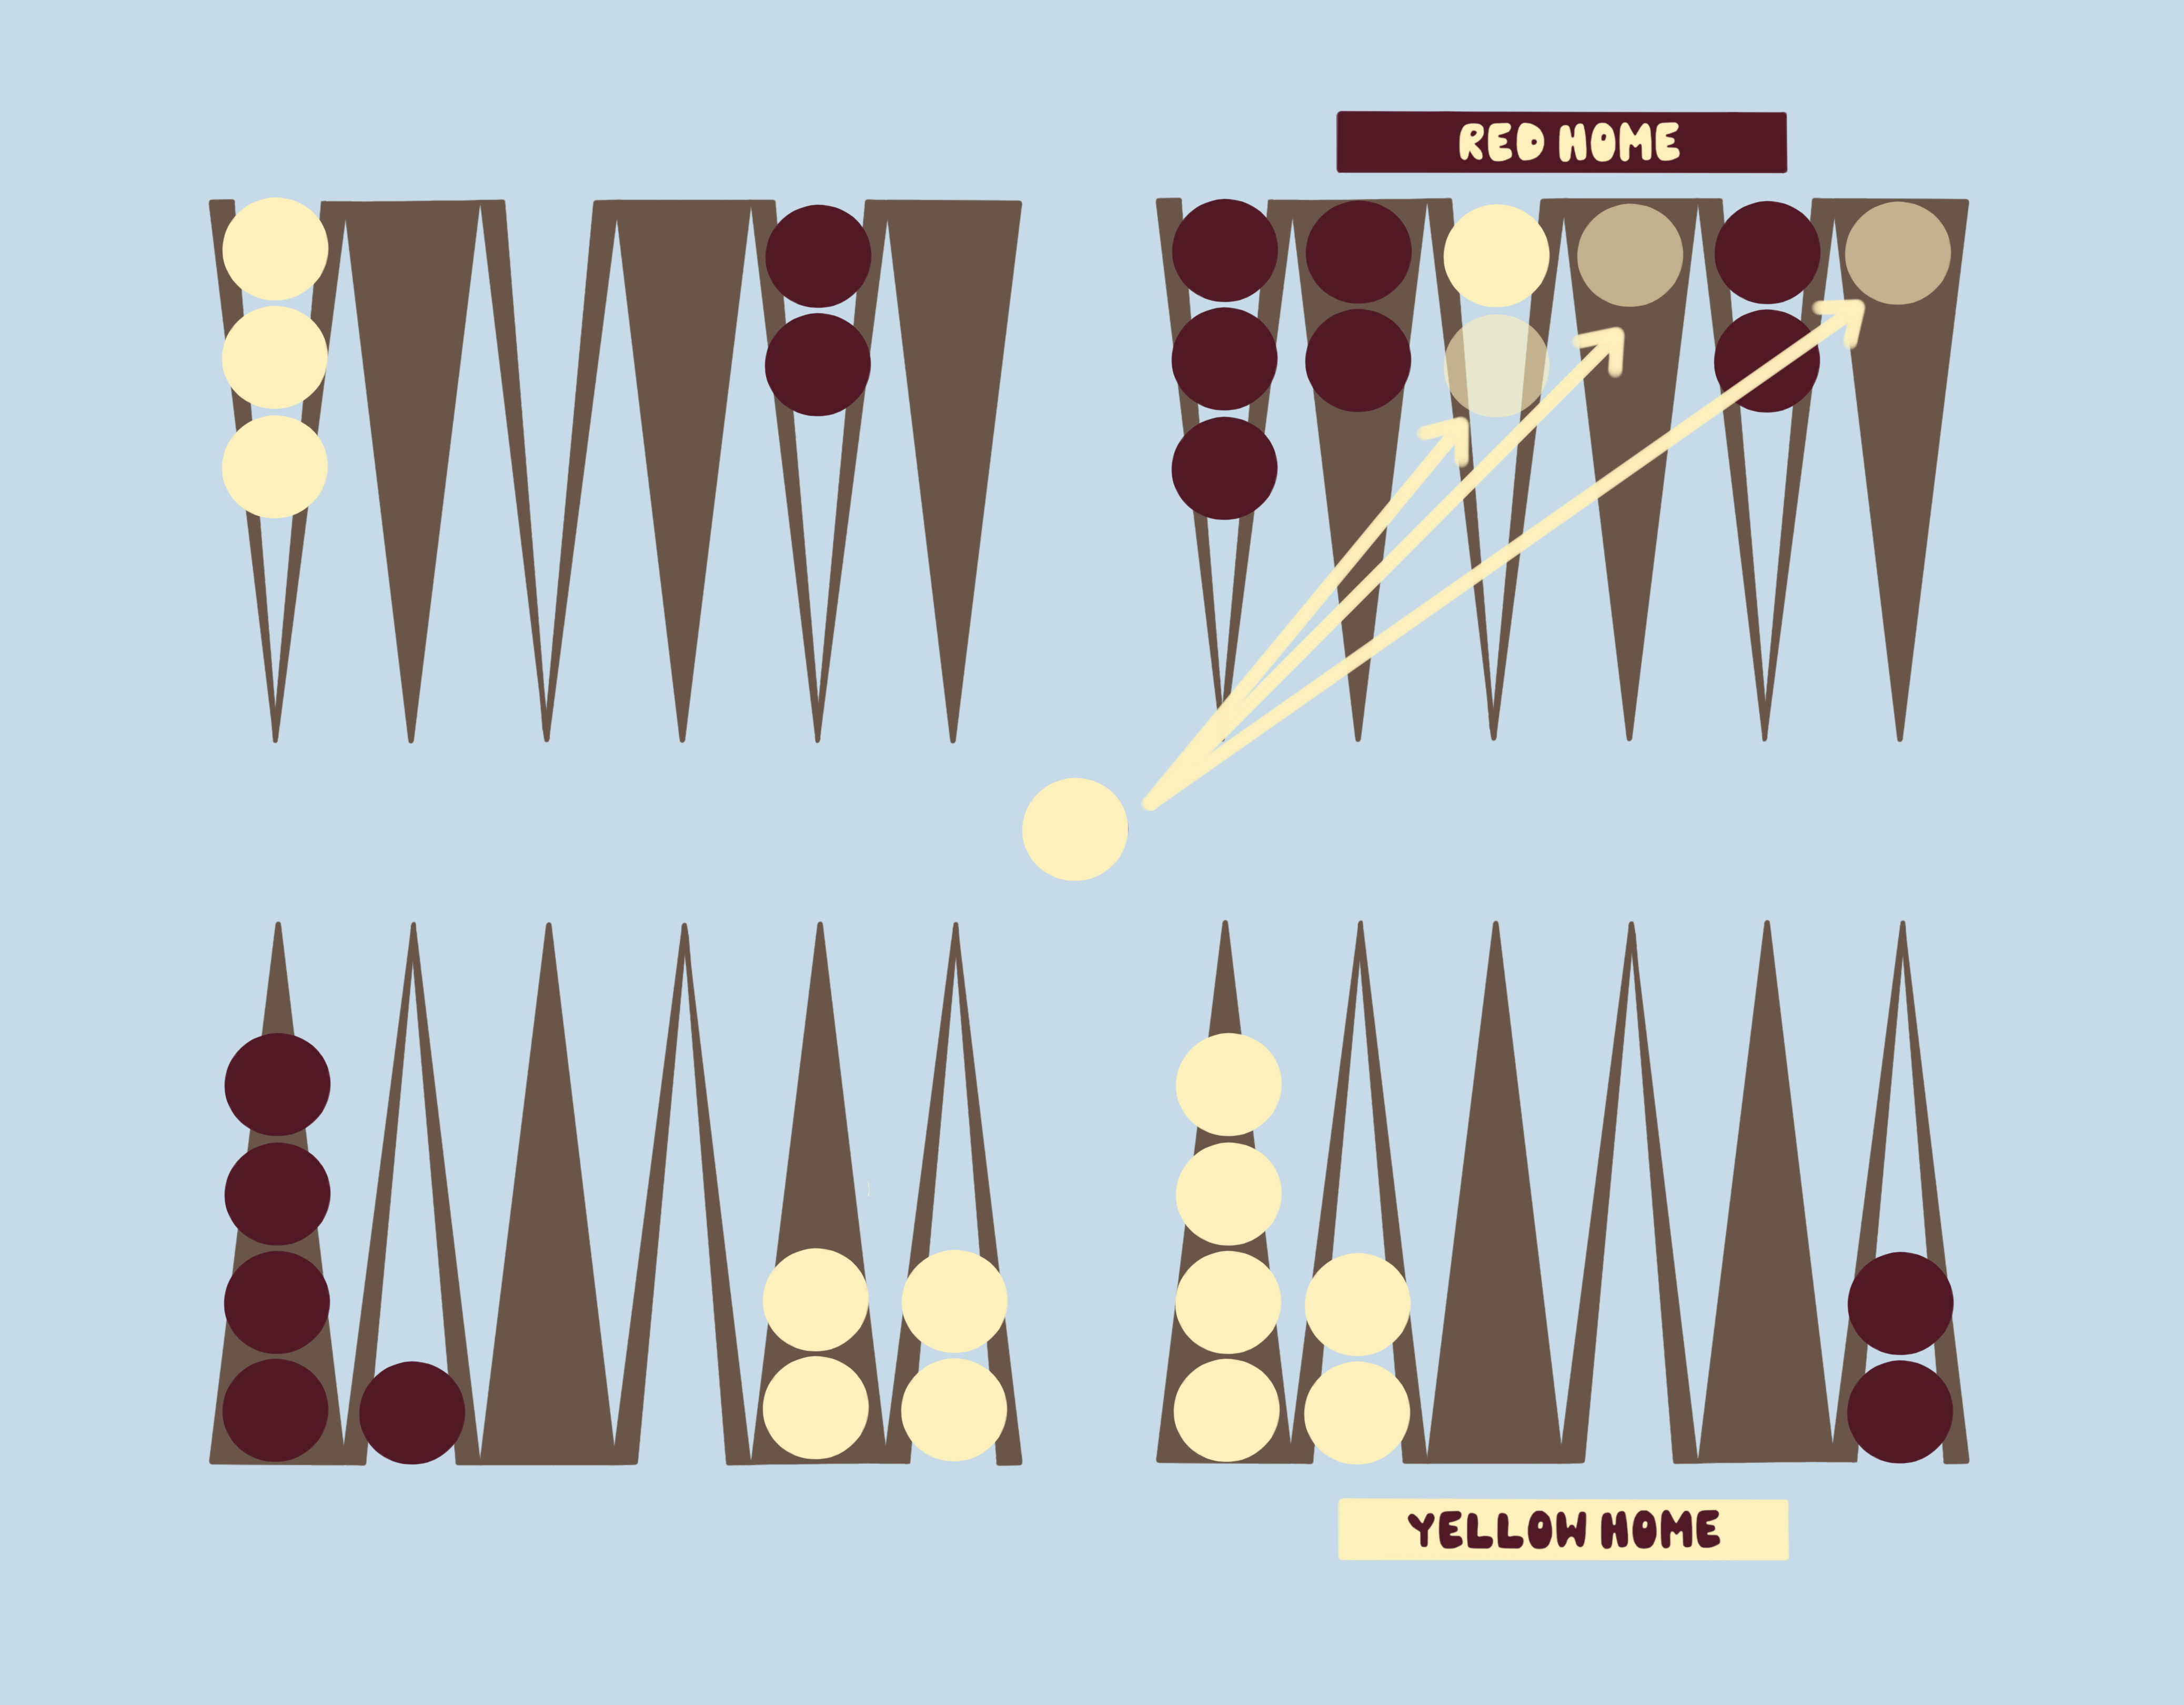
  • They must re-enter into your home board before any other move
  • If they can't re-enter, their turn is skipped
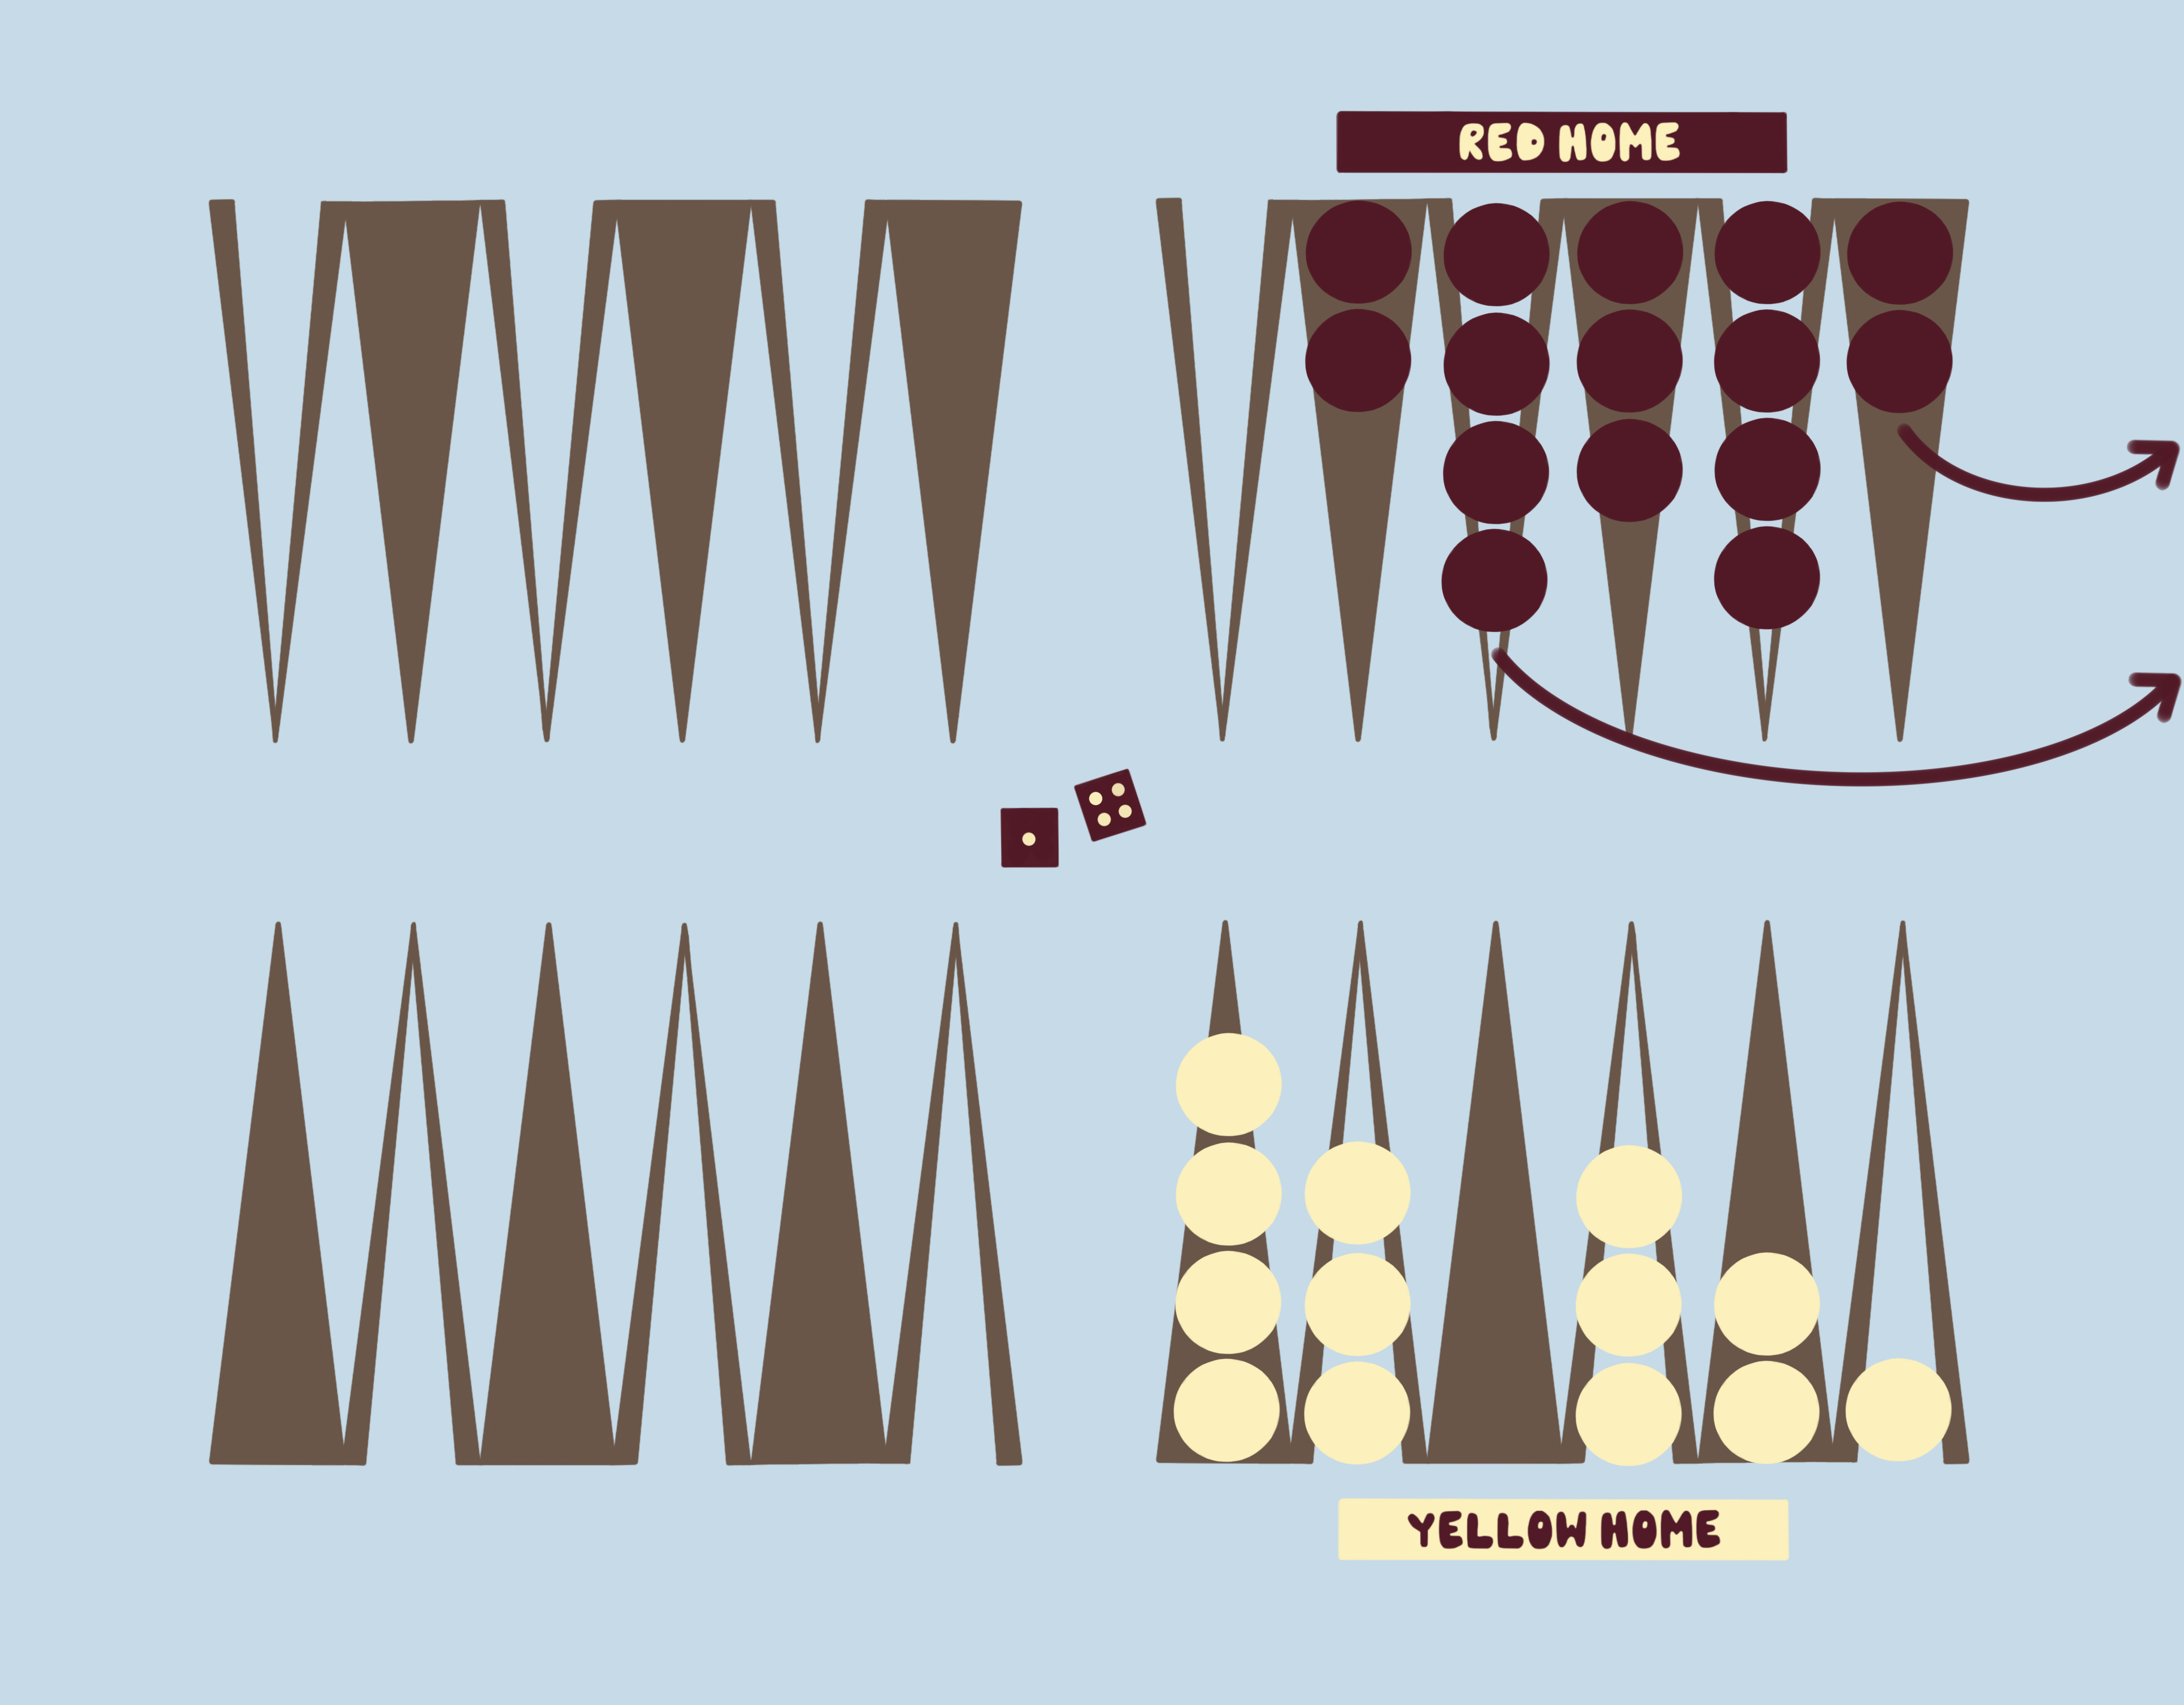
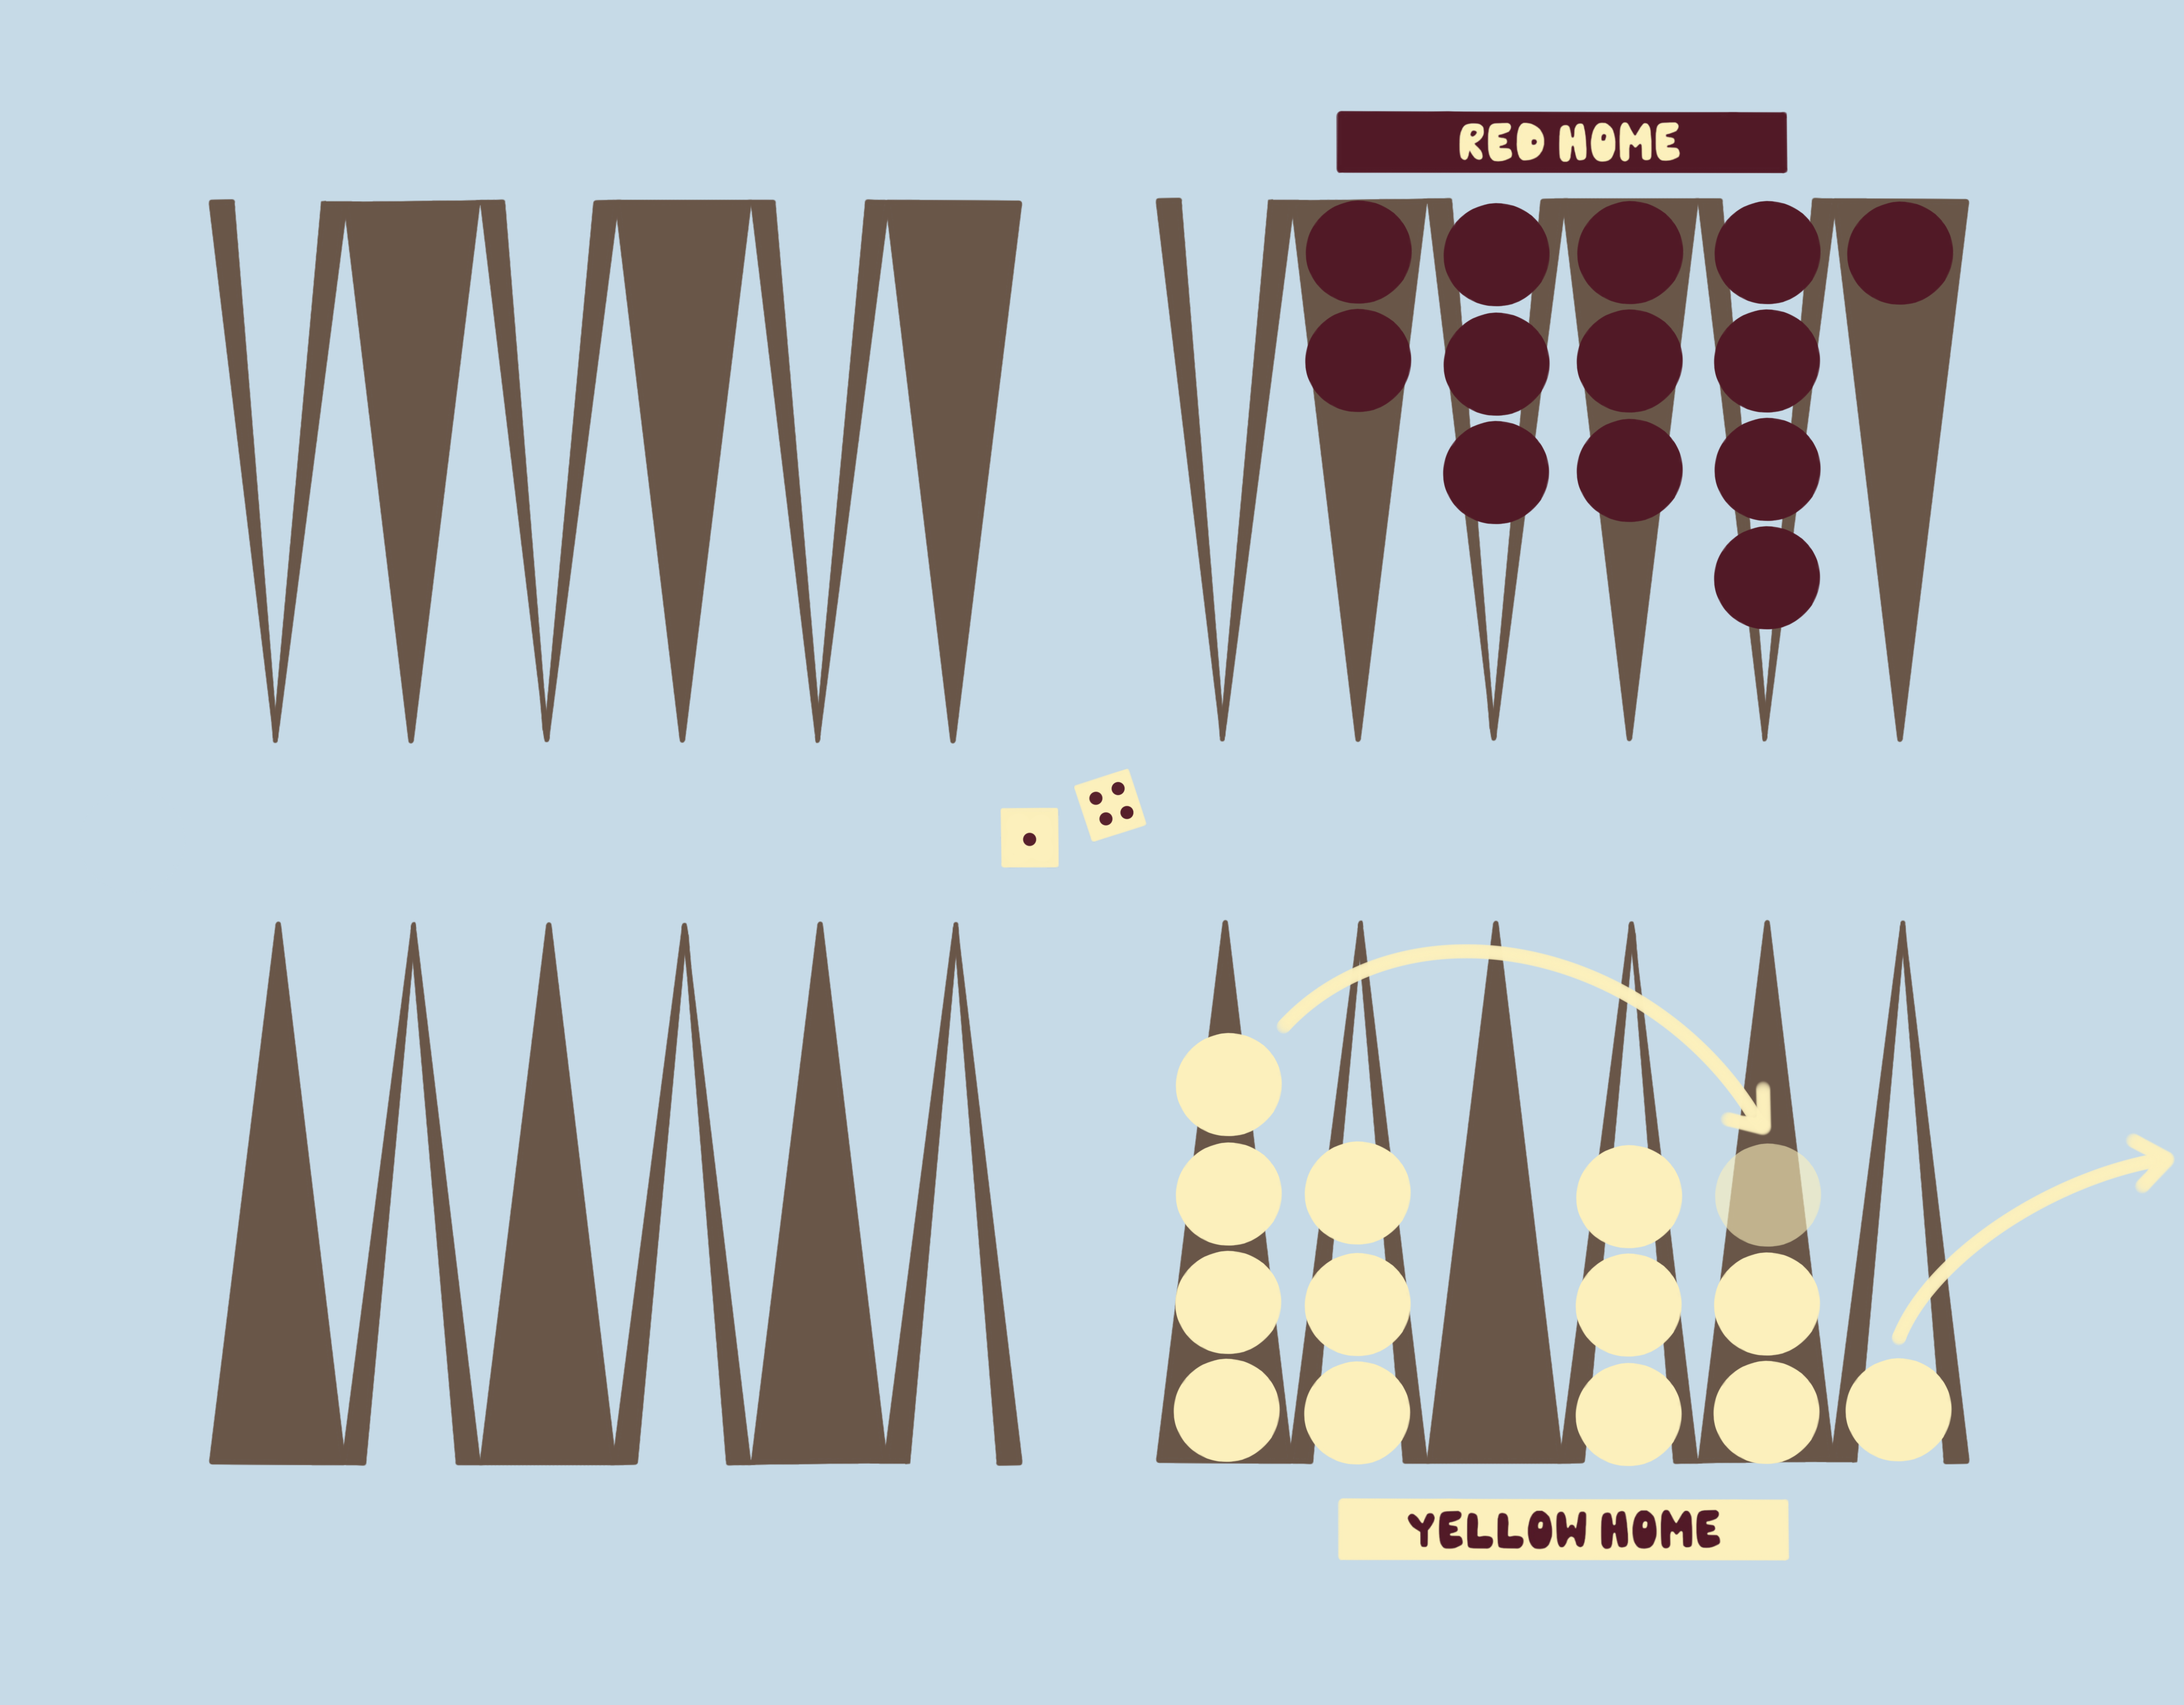
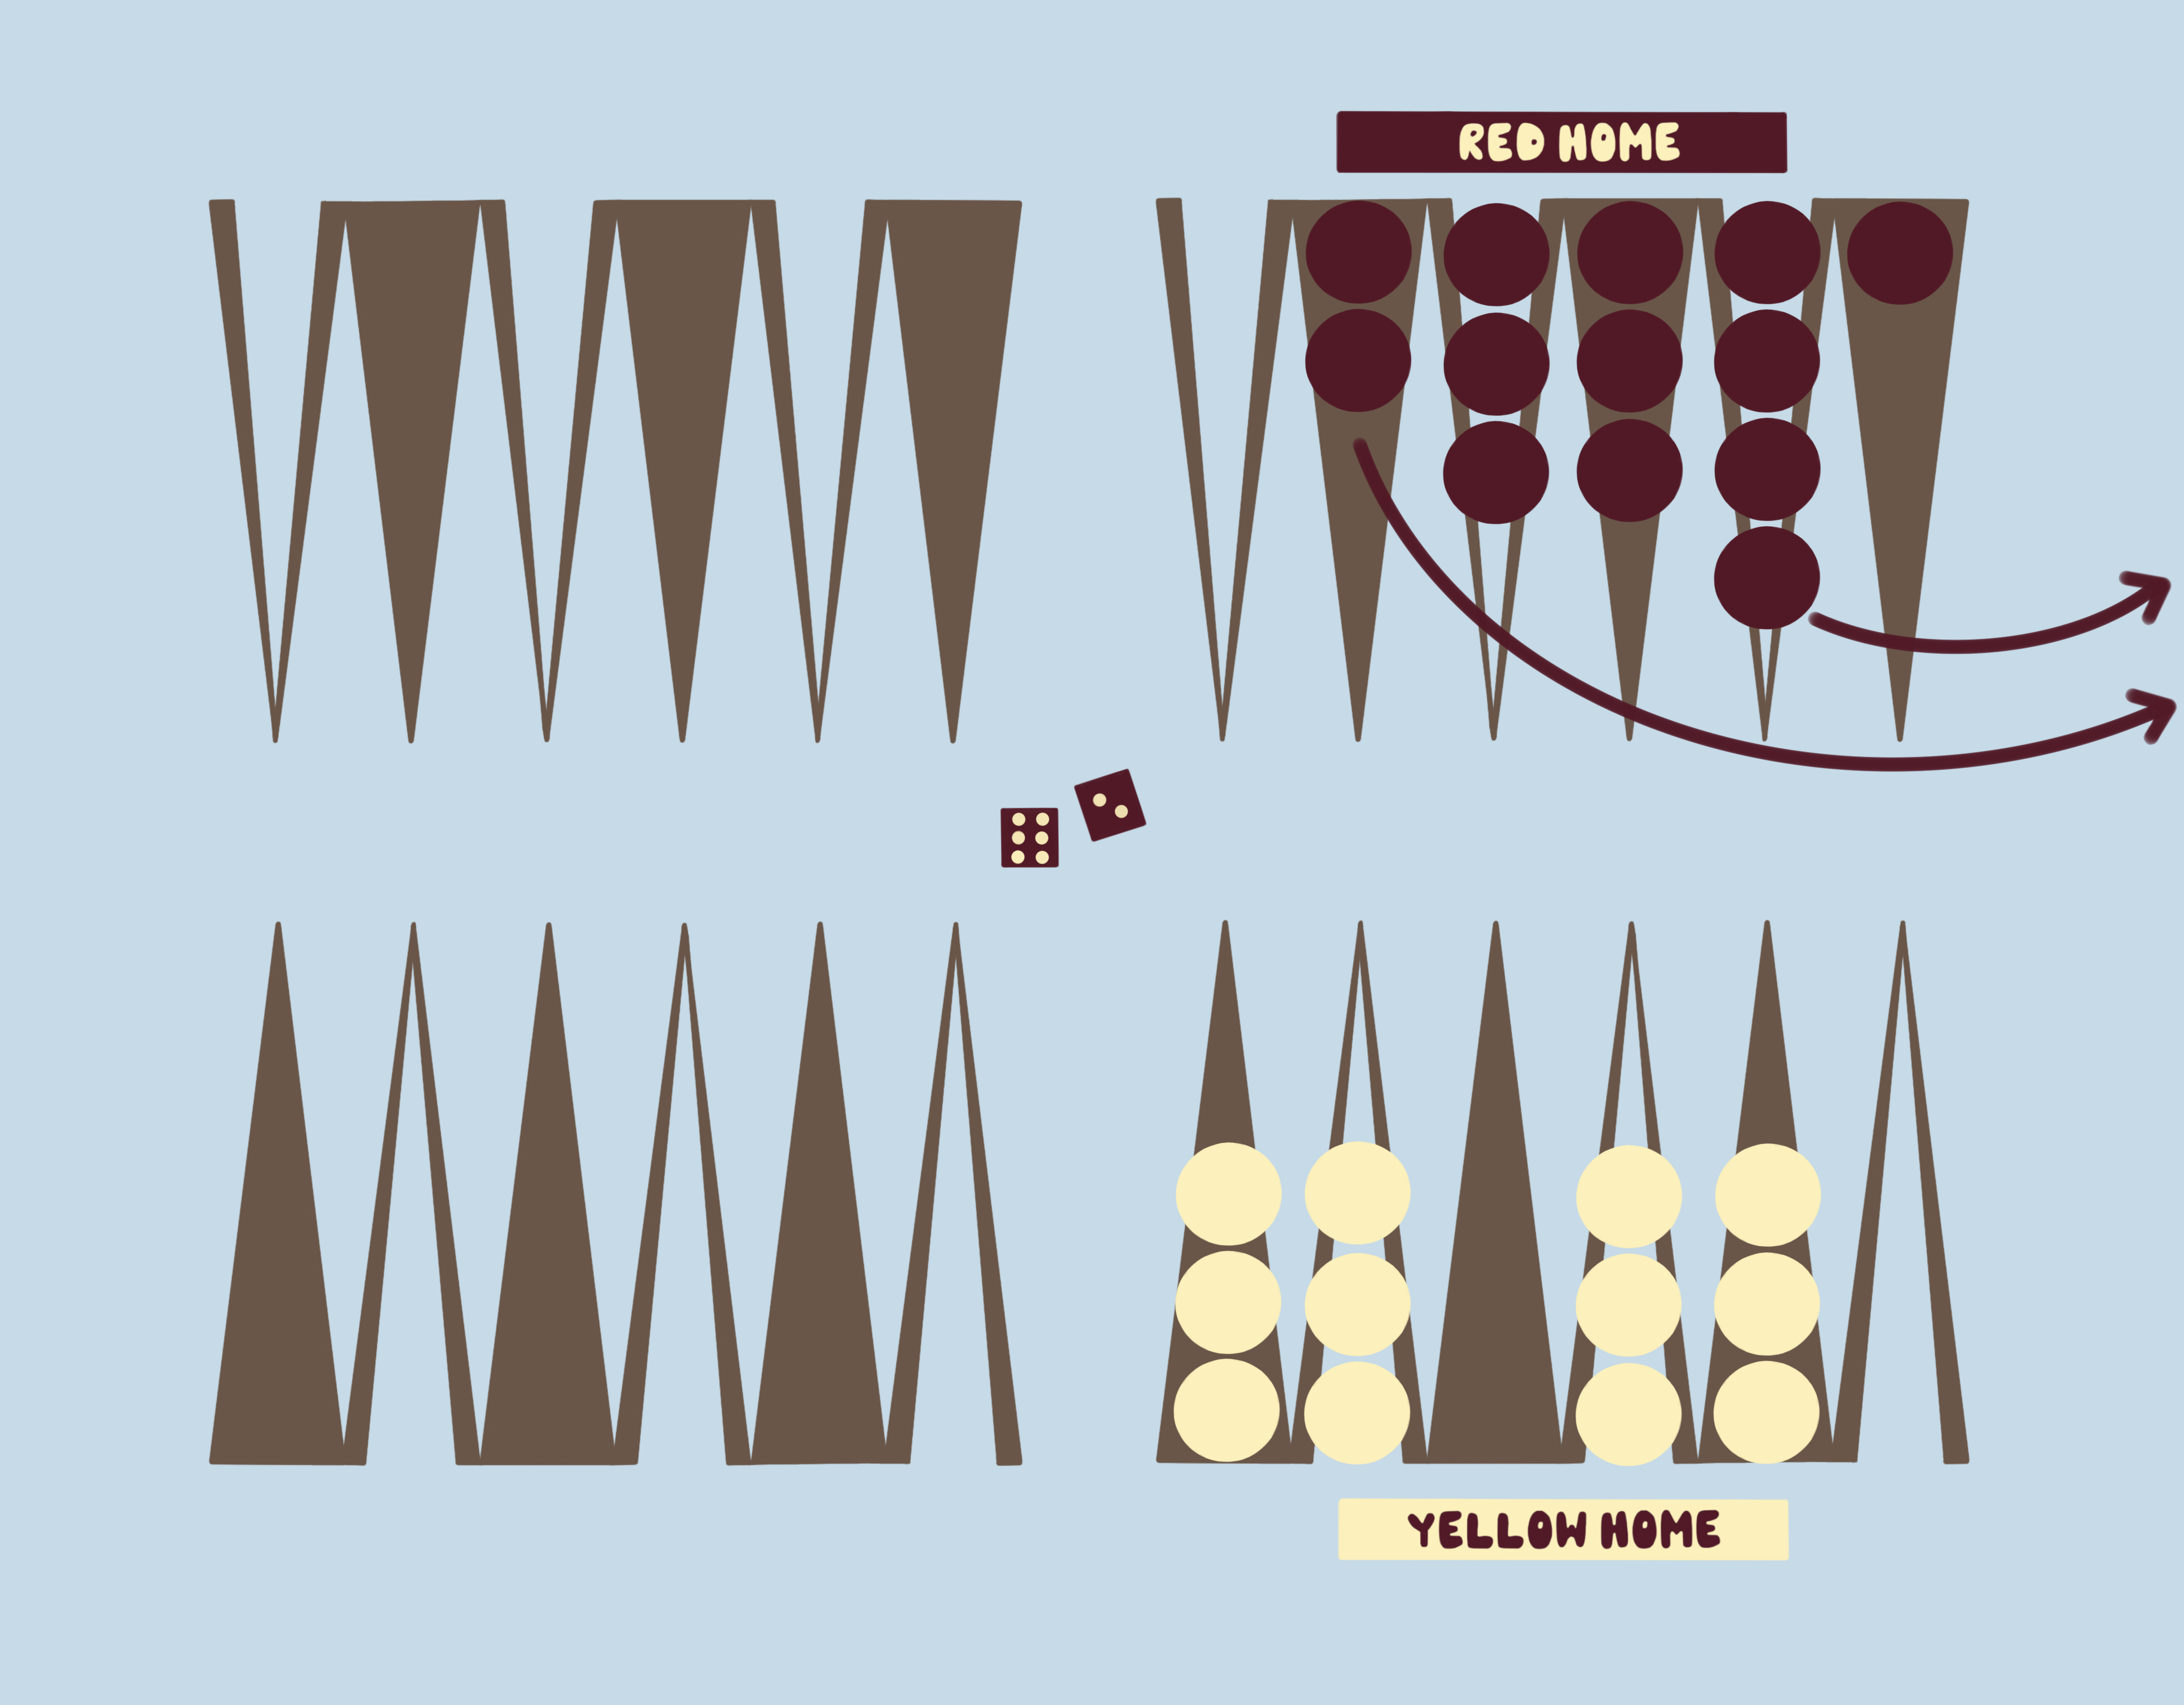
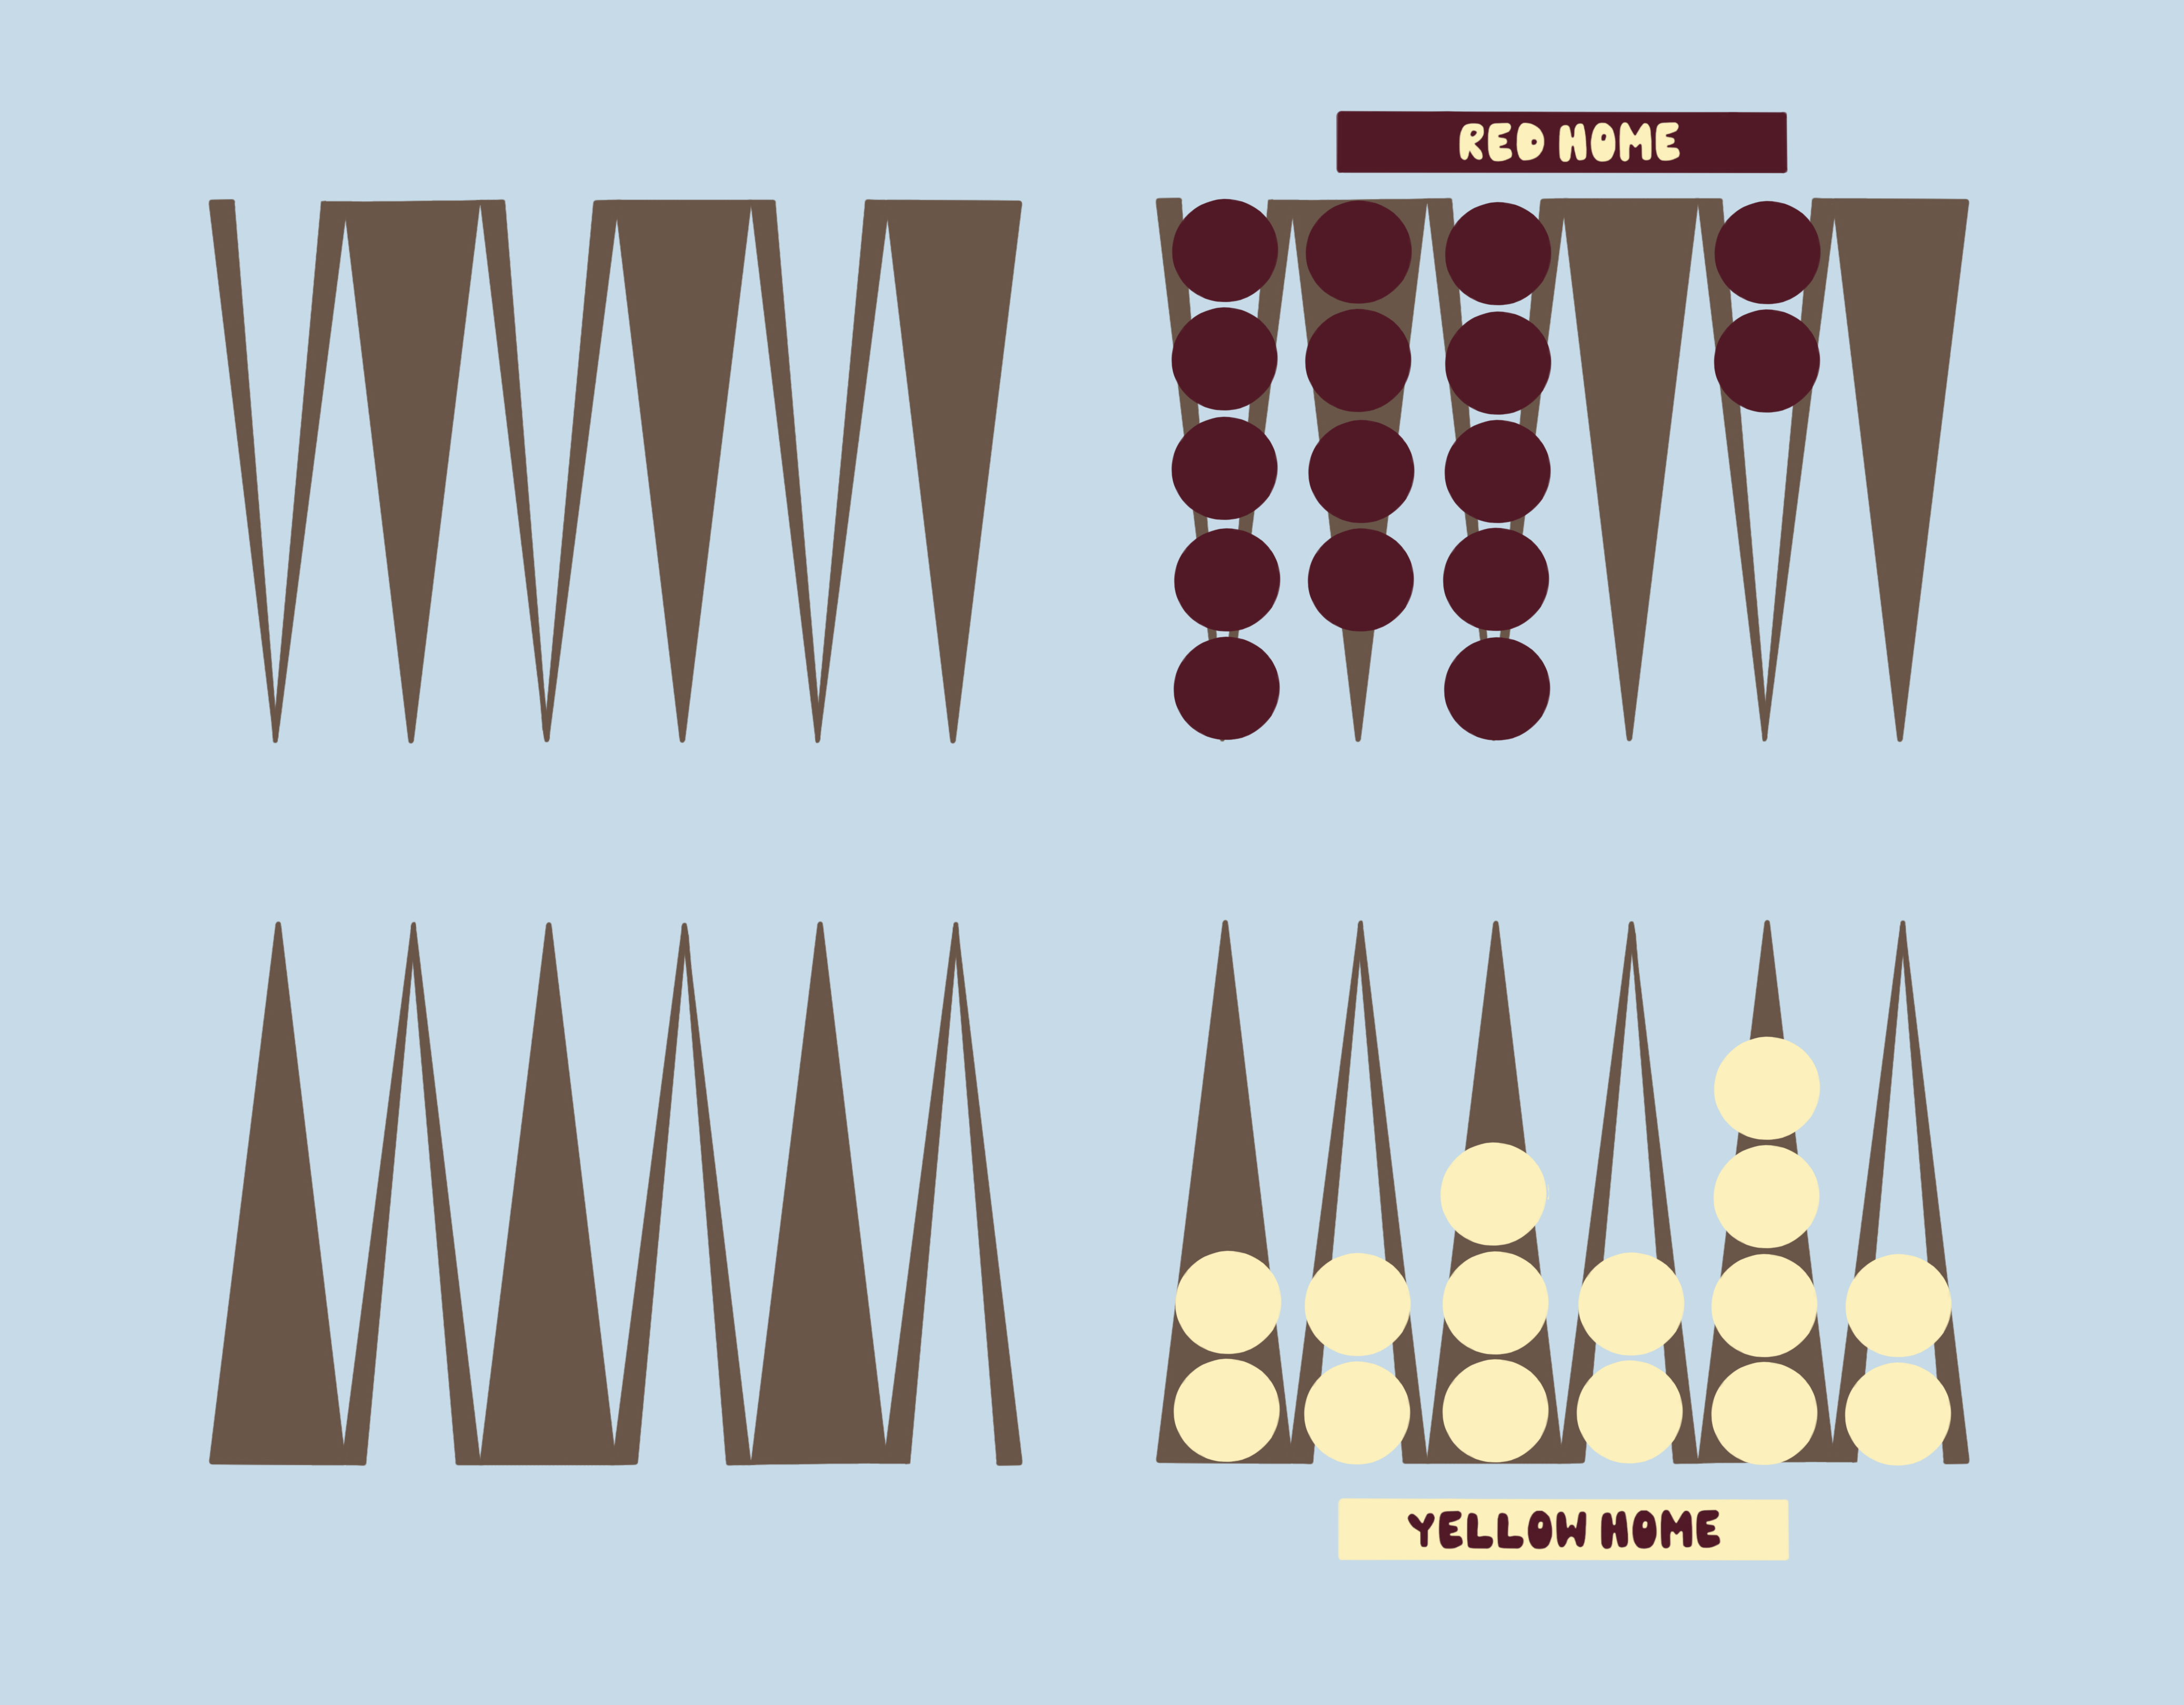
Bearing Off

  • Once all 15 checkers are in your home, start removing them
  • Roll a number, remove from that exact point
  • No checker there? Move from a higher point, or remove the highest

Scoring

  • Win = 1 point
  • Gammon (opponent bears off nothing) = 2 points
  • Backgammon (opponent still has checker in Reserve or your home) = 3 points
Menu:

Glossary and Set Up

Checker

A playing piece. Each player has 15 checkers in their color.

Point

One of the 24 narrow triangles on the board where checkers are placed. You own a point when you have two or more checkers on it.

Home Board

Your final six points. This is where you move all your checkers before bearing off.

Blot

A single checker sitting alone on a point. A blot is vulnerable — your opponent can hit it and send it to the Reserve.

Reserve

A holding area for checkers that have been hit. If one of your checkers gets hit, it goes to the Reserve and must re-enter the board before you can move any other pieces.

Bearing Off

The final phase of the game where you remove your checkers from the board. The first player to bear off all 15 checkers wins.

Prime

A row of 4–6 consecutive points that you own, creating a wall your opponent can't jump over.

Board diagram showing key elements

Know your board: key elements explained

Setting up board

Set up like this: each color will move in the direction of their home.

Build a Prime: A prime is a row of 4–6 consecutive points that you own — and it's one of the most powerful structures in backgammon. A prime acts as a wall that your opponent's checkers can't jump over, trapping them behind it. The longer the prime, the harder it is to escape. A six-point prime is virtually unbeatable — your opponent is completely stuck until you break it.

How to Play

Rolling and Moving

Each turn, roll both dice. You must move your checkers the number of points shown on each die. You can move one checker the total, or split the moves between two checkers.

Move one checker the total

Move one checker the total

Split moves between two checkers

Split moves between two checkers

Rolling doubles

Rolling doubles: double the amount of dice

Hitting and Re-entering

If a point has only one of your opponent's checkers, you can land on it and send it to the Reserve.

Hitting a blot

Hitting your opponent

Re-entering from the bar

Re entering: Yellow can only enter if they roll a 1, 3 or 4

Bearing Off

Once all 15 of your checkers are in your home board, you can start bearing them off — removing them from the board entirely. You can not bear off any checkers if you have checkers outside of your home.

Remove from the exact point

Remove from the exact point

Move from a higher point

Move from a higher point

Remove from the highest occupied point

Remove from the highest occupied point

The first player to bear off all of their checkers wins!

Scoring

Each game is worth one point, but you can score more depending on how you win:

The Doubling Cube: At any point in the game, a player can offer to double the stakes by placing the doubling cube on 2. The opponent can accept and play on for double the points, or refuse and concede the current game. The cube can be redoubled (4, 8, 16...) but only by the player who last accepted it.

Quick Tips

Opening moves to remember:

Lover's Leap

Lovers Leap

Six and One

Six and one

Two Points Apart

Two points apart

Game strategy:

Leave an anchor

Leaving an anchor

Avoid stacking

Avoid stacking: yellow did a good job of this here